ARM template vs. Custom JSON files
As more organizations embrace cloud platforms like Microsoft Azure for their data projects, the configuration possibilities for cloud-based data architectures have exploded. This makes deploying updates across different environments without any hiccups more challenging. Automatic deployment has emerged as a solution that offers a way to accelerate delivery, minimize errors, and ensure a more efficient monitoring process.
This guide focuses on how to deploy new changes in Azure Data Factory (ADF), a cloud-based data integration service that allows data engineers to orchestrate and automate data movement and transformation. Leading us through the two main deployment methods are Levi9’s Carmen Girigan, Data Engineer, and Diana Crețu, Data Analyst/Engineer.
Why automation
“Managing the deployment of Azure Data Factory solutions across different environments, such as development, user acceptance testing (UAT), and production can be a complex and time-consuming task,” explains Diana.
This is where Continuous Integration and Continuous Delivery (CI/CD) come into play. CI/CD automates the build, test, and deployment of applications, ensuring consistency and reducing human error. In the context of ADF, CI/CD allows data engineers to automatically deploy their solutions first to the development environment and then to UAT and production, ensuring consistency and reducing the risk of errors.

The two deployment methods
For the continuous delivery of ADF data pipelines, you can choose between two main methods:
- ARM template deployment
- Custom JSON files deployment
This guide walks you through both options step-by-step, along with tips from Carmen and Diana’s real-world experience.
Carmen’s pick: Automated deployment with ARM templates
The first method of automating ADF deployment involves using Azure Resource Manager (ARM) templates. ARM templates are JSON files that allow you to define your Azure infrastructure configurations as code.
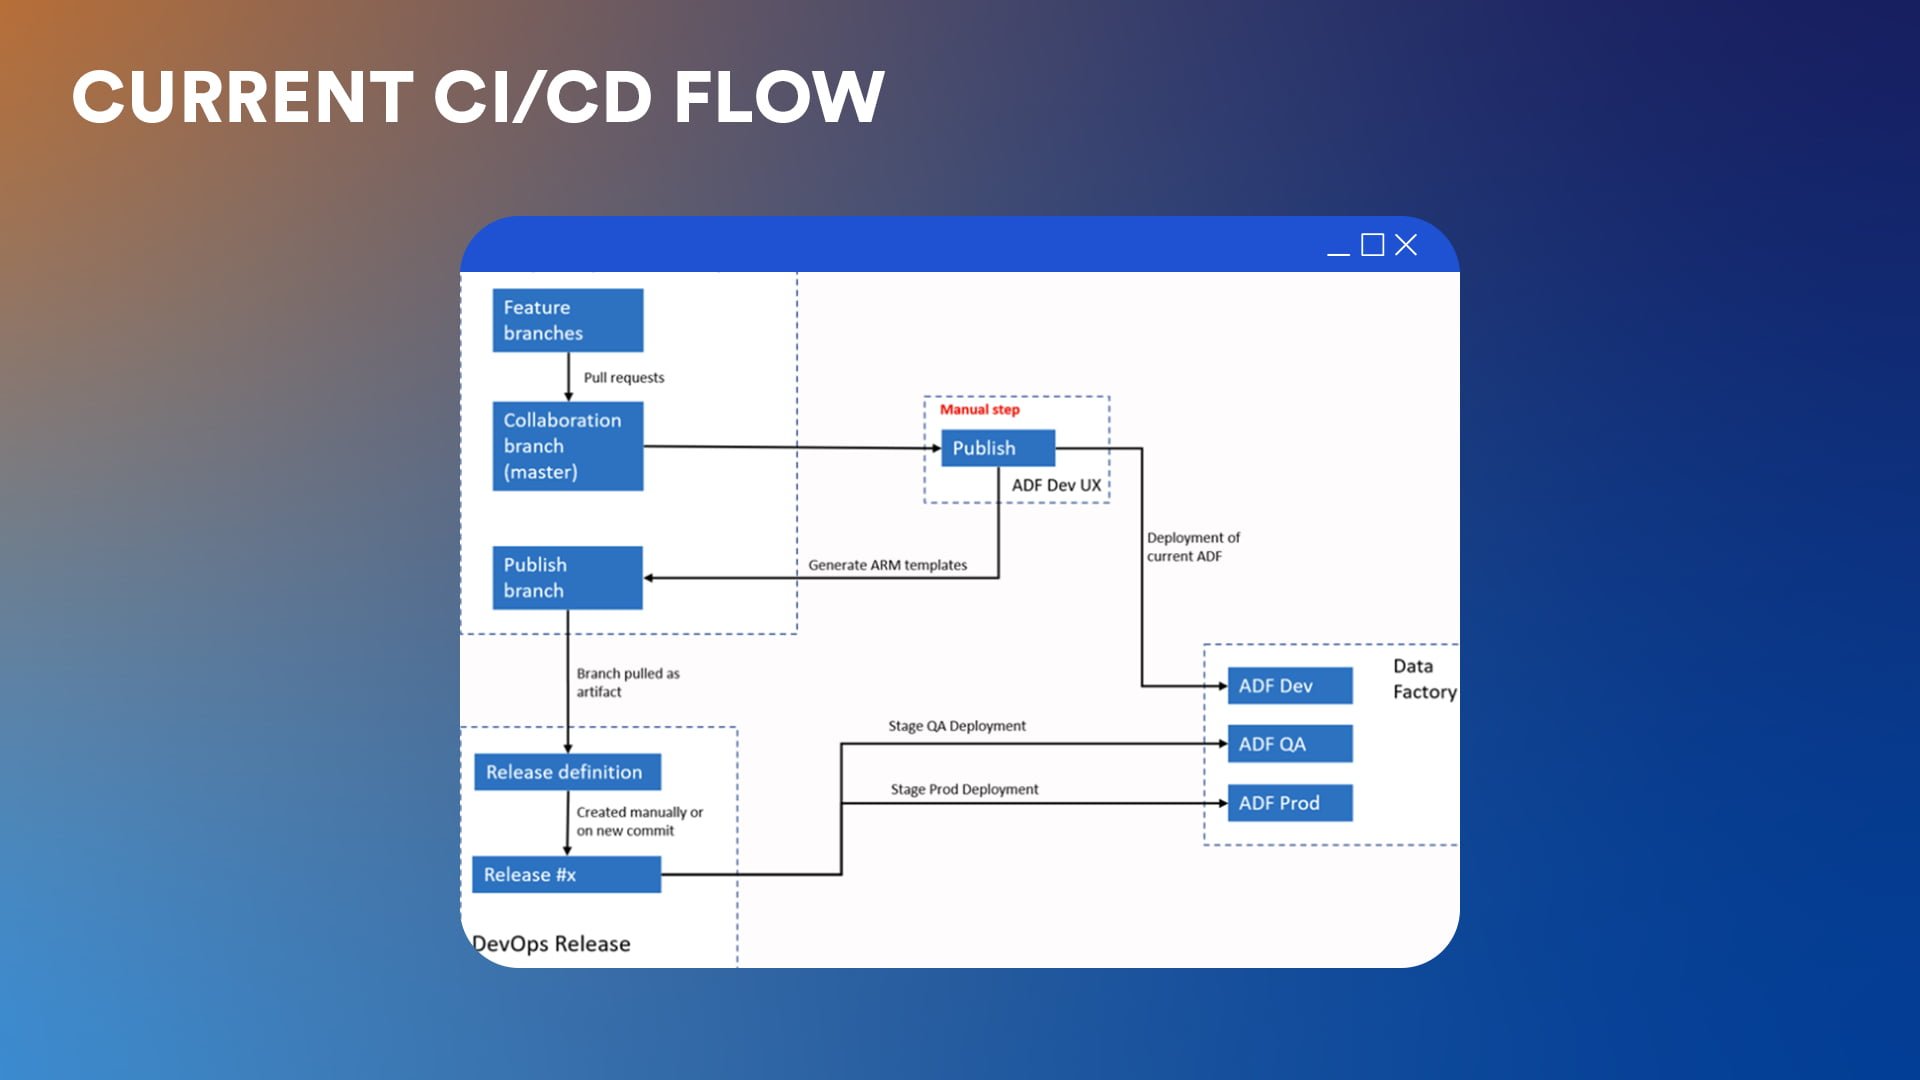
Step 1: Set up GIT integration for ADF
The first step is linking your ADF instance to a GitHub or Azure DevOps Git repository — and this will be your first step in the second method as well. In the repository, “developers create feature branches and when they are satisfied with their work they push it to the collaboration branch“, explains Carmen.
Step 2: Generate the ARM template
Once the changes in Azure DevOps Repos are approved, the next step is to generate the ARM templates. This is done by clicking the “Publish” button in the ADF workspace. The action will generate the ARM templates in the publish branch, called “ADF_publish.”
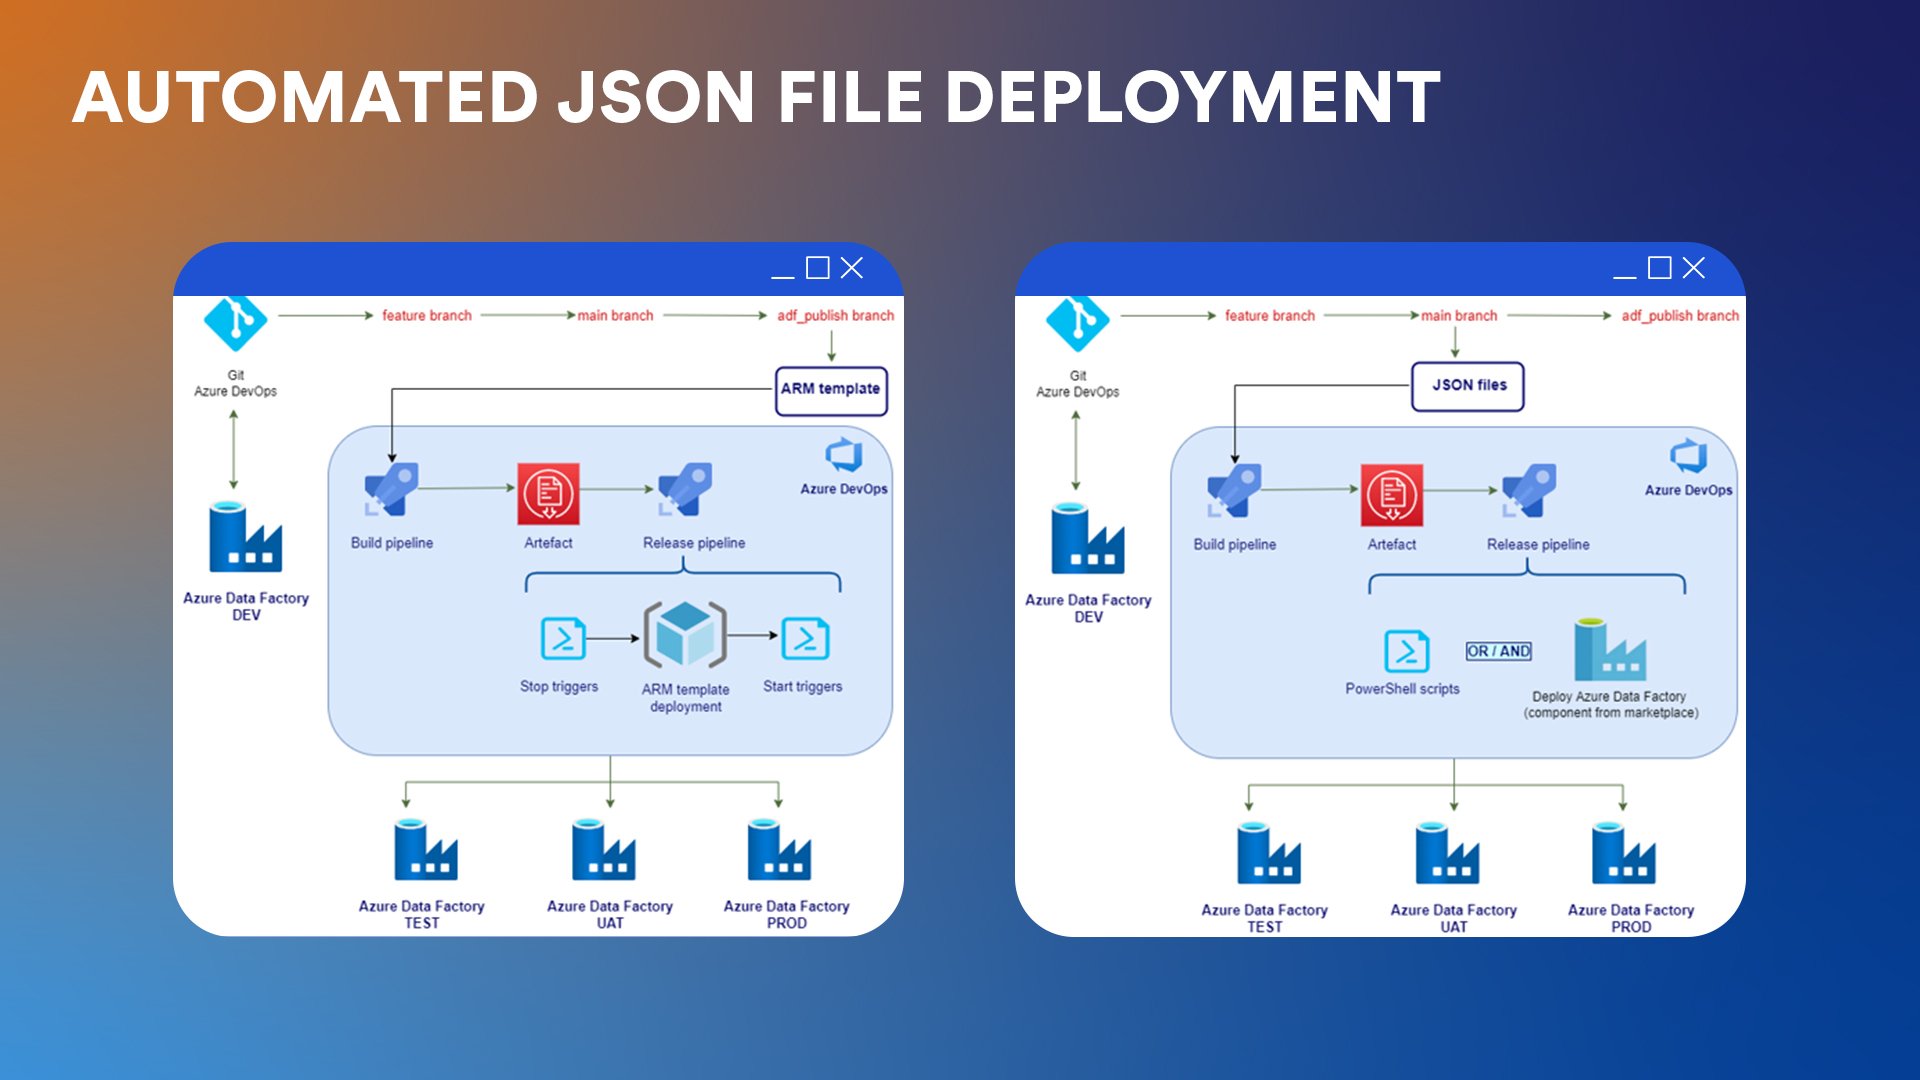
As a result, the automation generates one large JSON file with all the objects in ADF, be they pipelines, datasets, data flows, and so on, and a smaller JSON file with parameters. This is a key difference from the second method of deployment presented in the second part of the guide.
The manual “Publish” step can also be automated. For those who like a no-touch approach to deployments, the process can also be triggered by the Azure DevOps Repos commit on the collaboration branch.
Step 3: Configure ARM template parameters
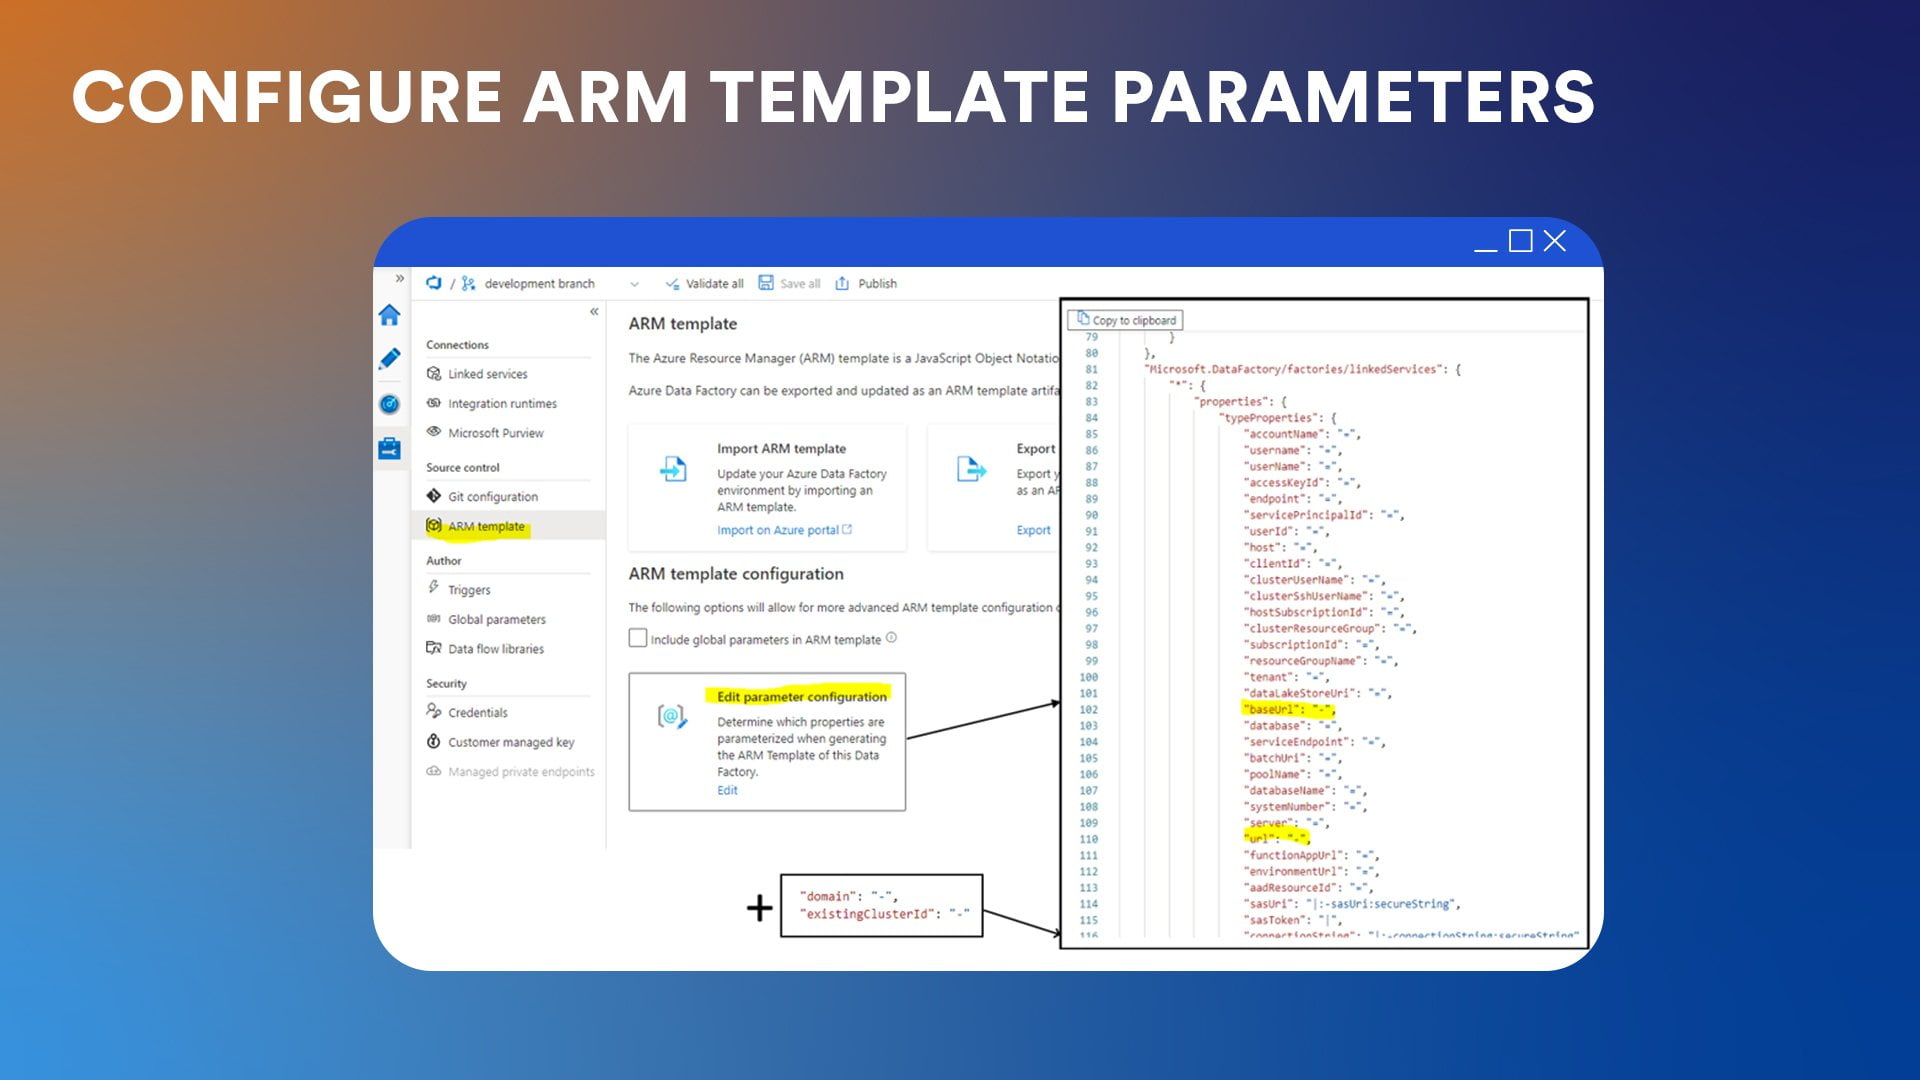
When generating the ARM template from ADF, you can configure exactly which properties get parameterized. To simplify the parameterization process, Carmen recommends using the “Edit Parameter Configuration” option in the ADF workspace, Manage hub. This option lets you choose properties for linked services whose values you want to exclude from the ARM template. The parameters then get generated without any default values.
“This is safer than accidentally including default development environment values”, explains Carmen.
Step 4: Use variable groups
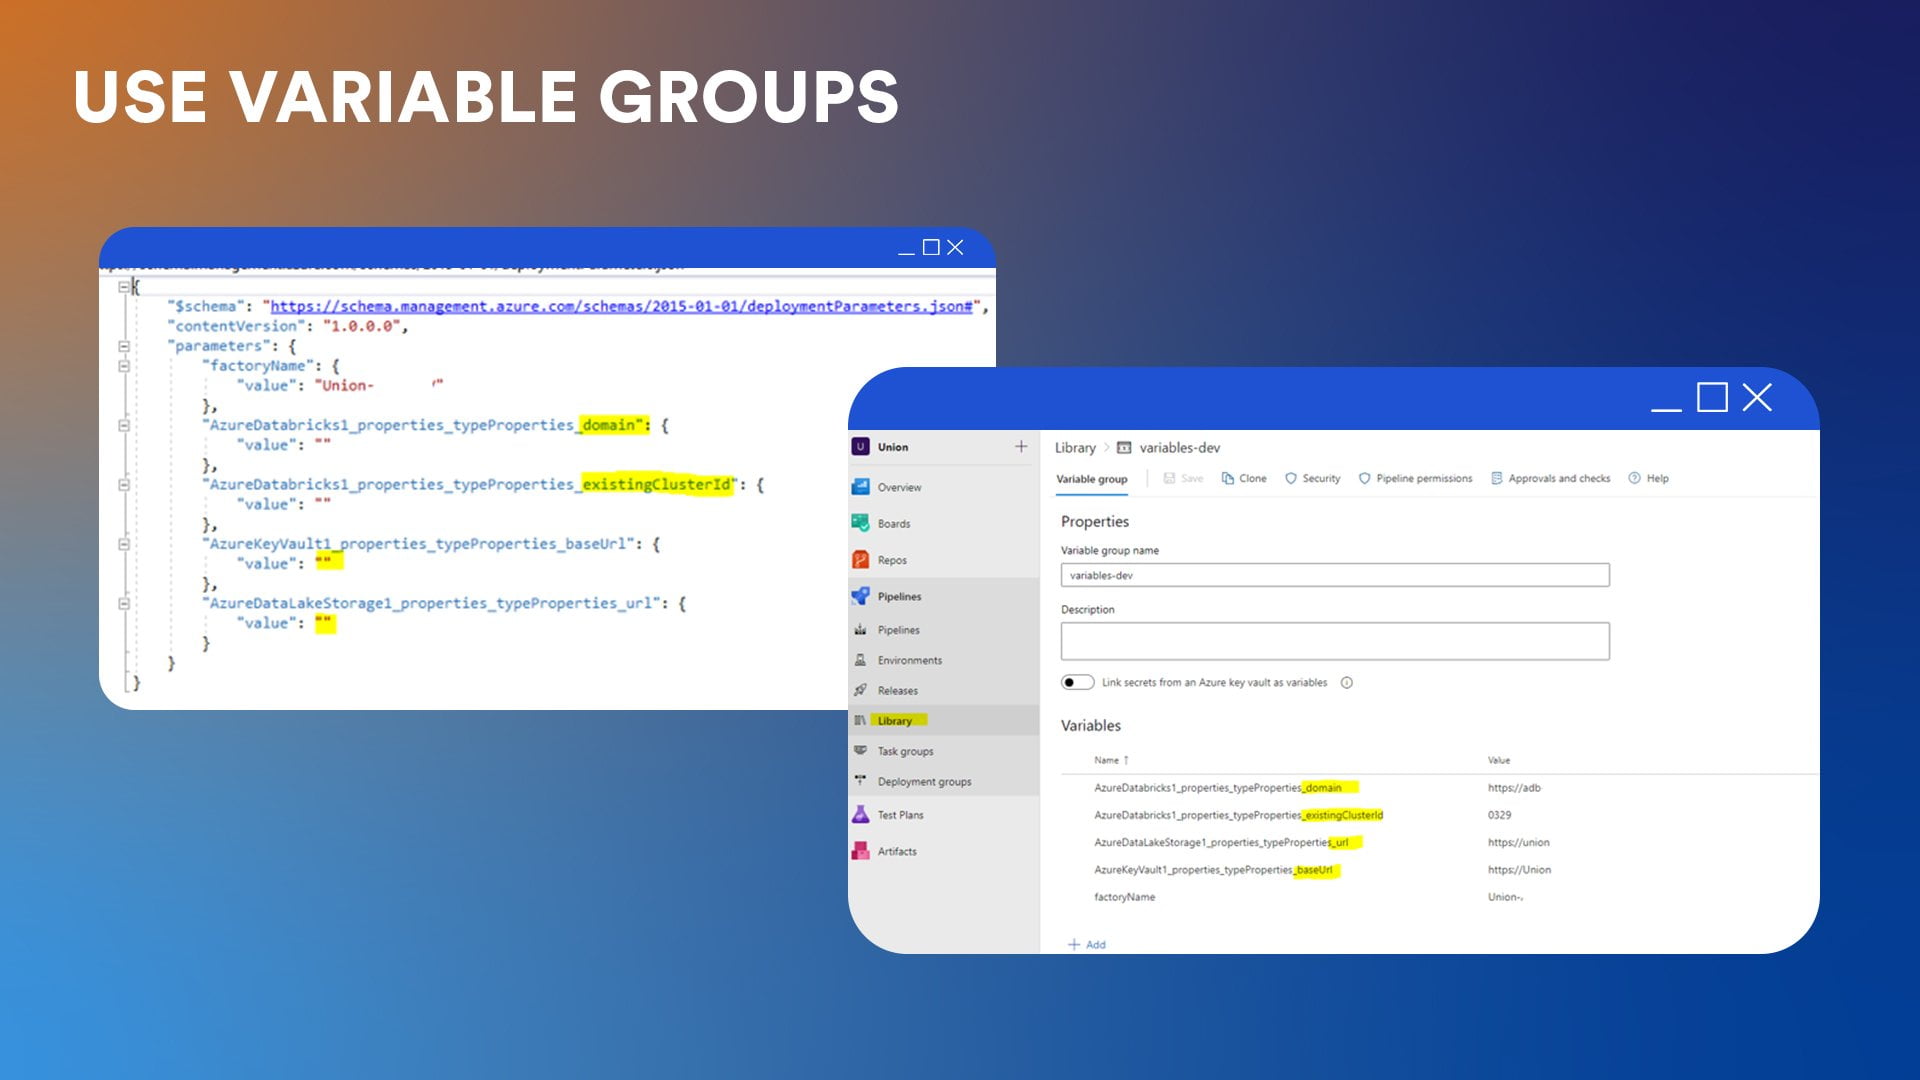
In Azure DevOps, variable groups are created for each environment (dev, UAT, and prod) to store the values for the parameterized properties. Carmen usually creates one variable group for each environment: variables-dev, variables-prod, and variables-UAT.
Step 5: The build pipeline
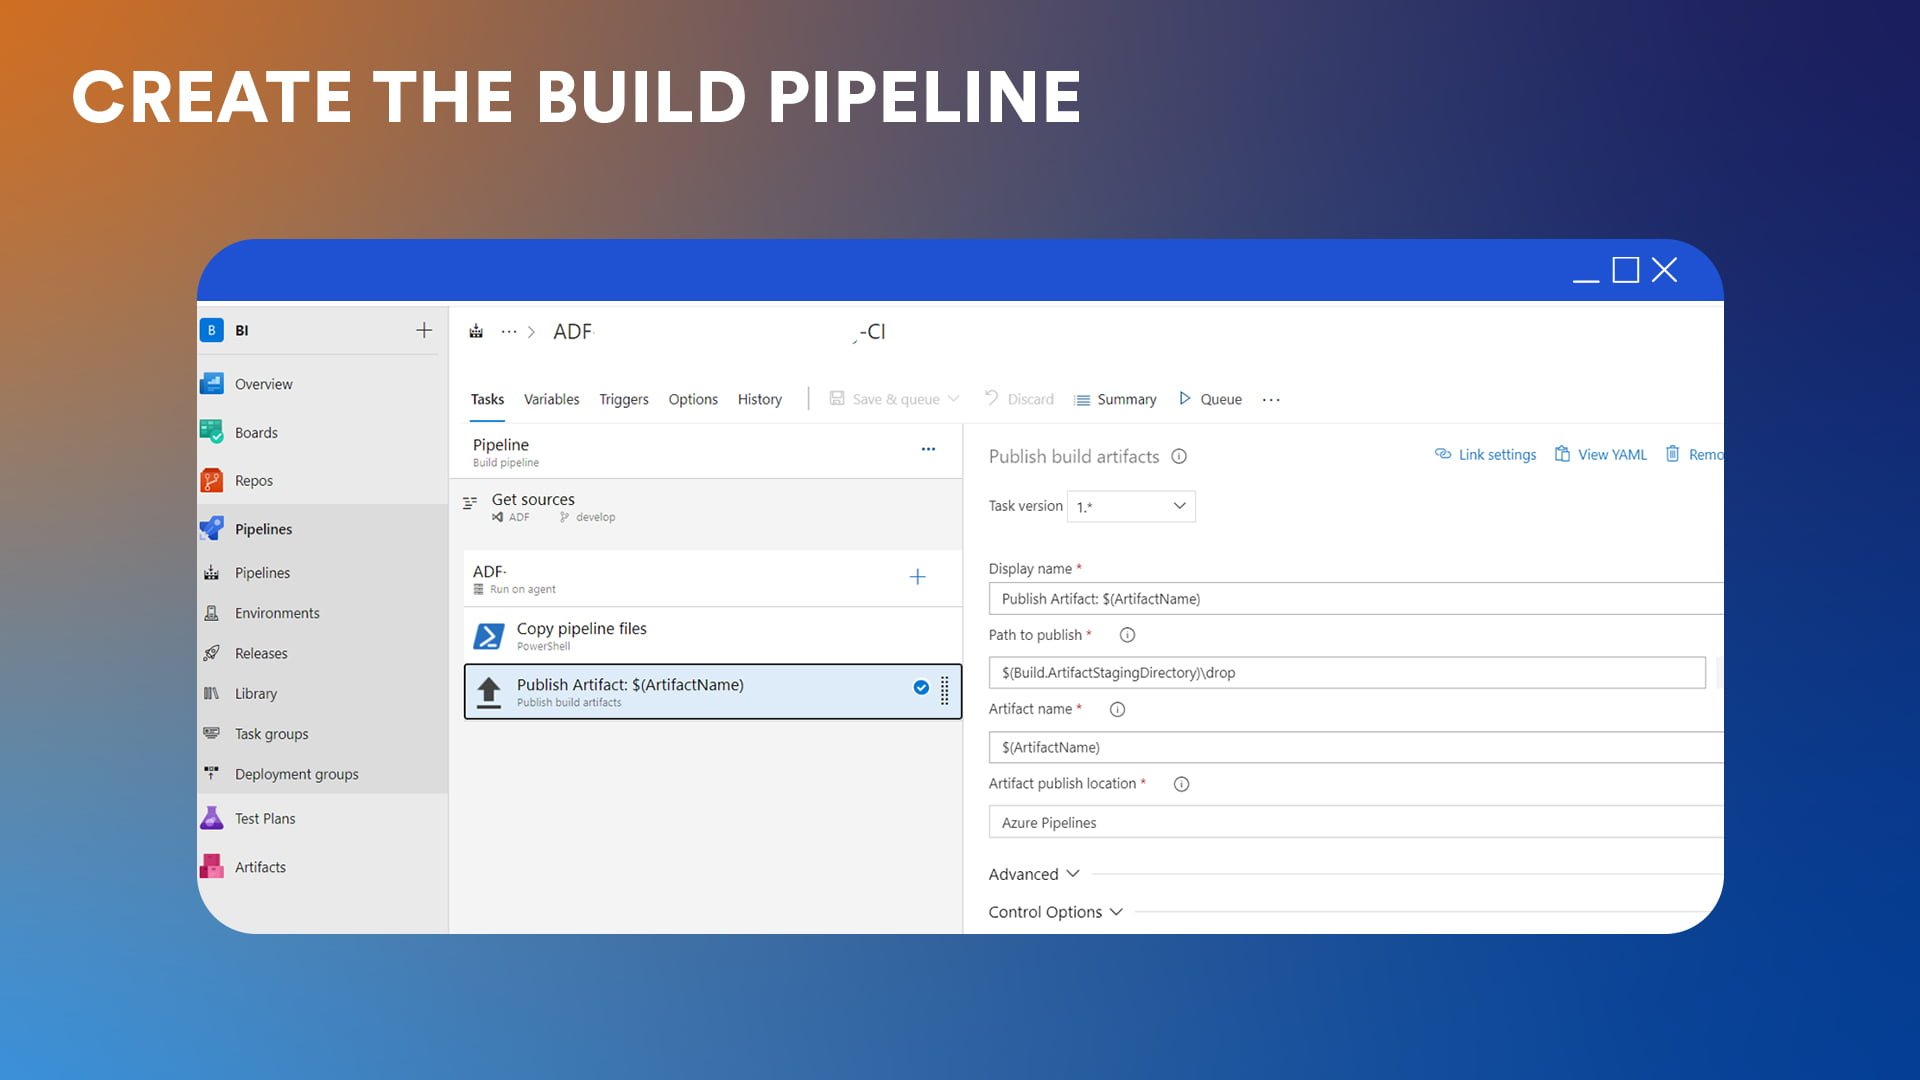
For this, you can use either the classic editor or YAML configuration files. Carmen prefers the classic editor for simplicity. This step simply copies the branch files and publishes the artifact without any customisation. It can be triggered automatically when we publish from the ADF collaboration branch.

Step 6: The release pipeline
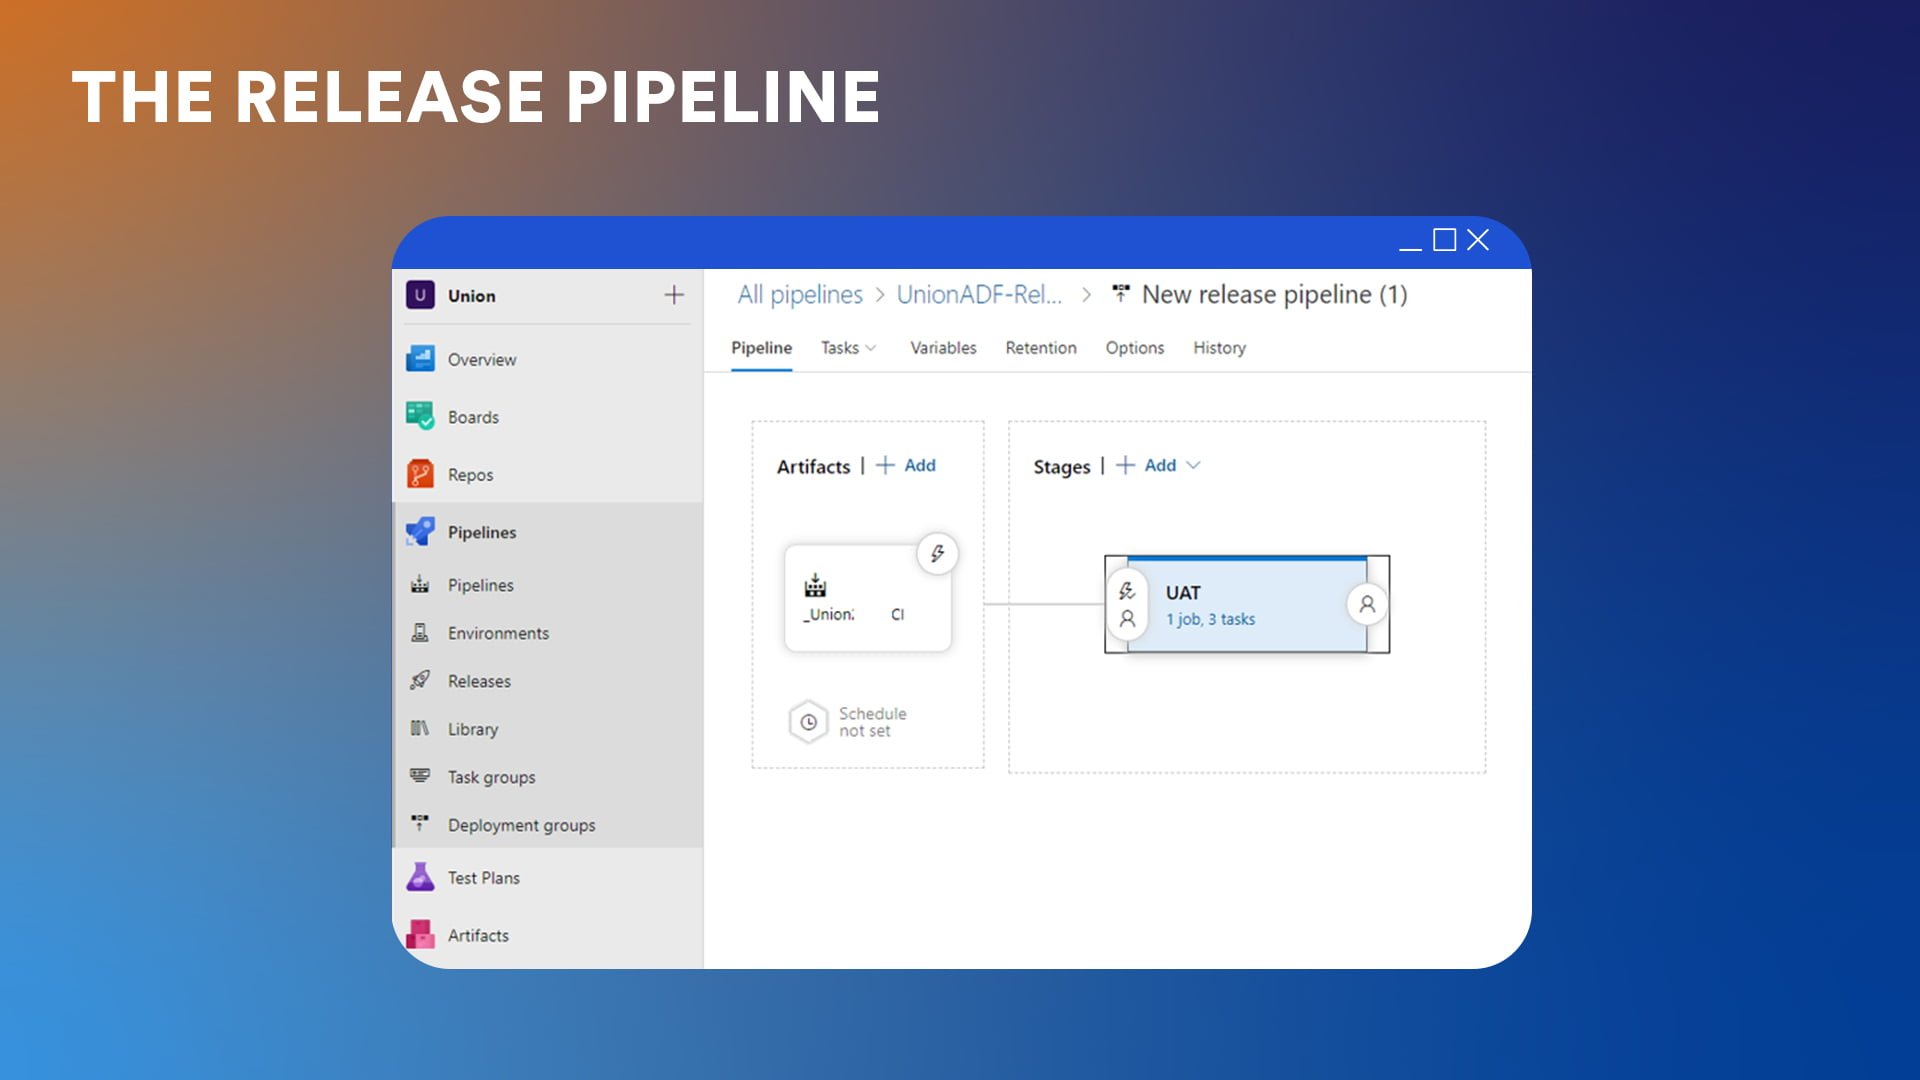
The release pipeline deploys the artifact in various environments. In Carmen’s case, this has two secondary steps.
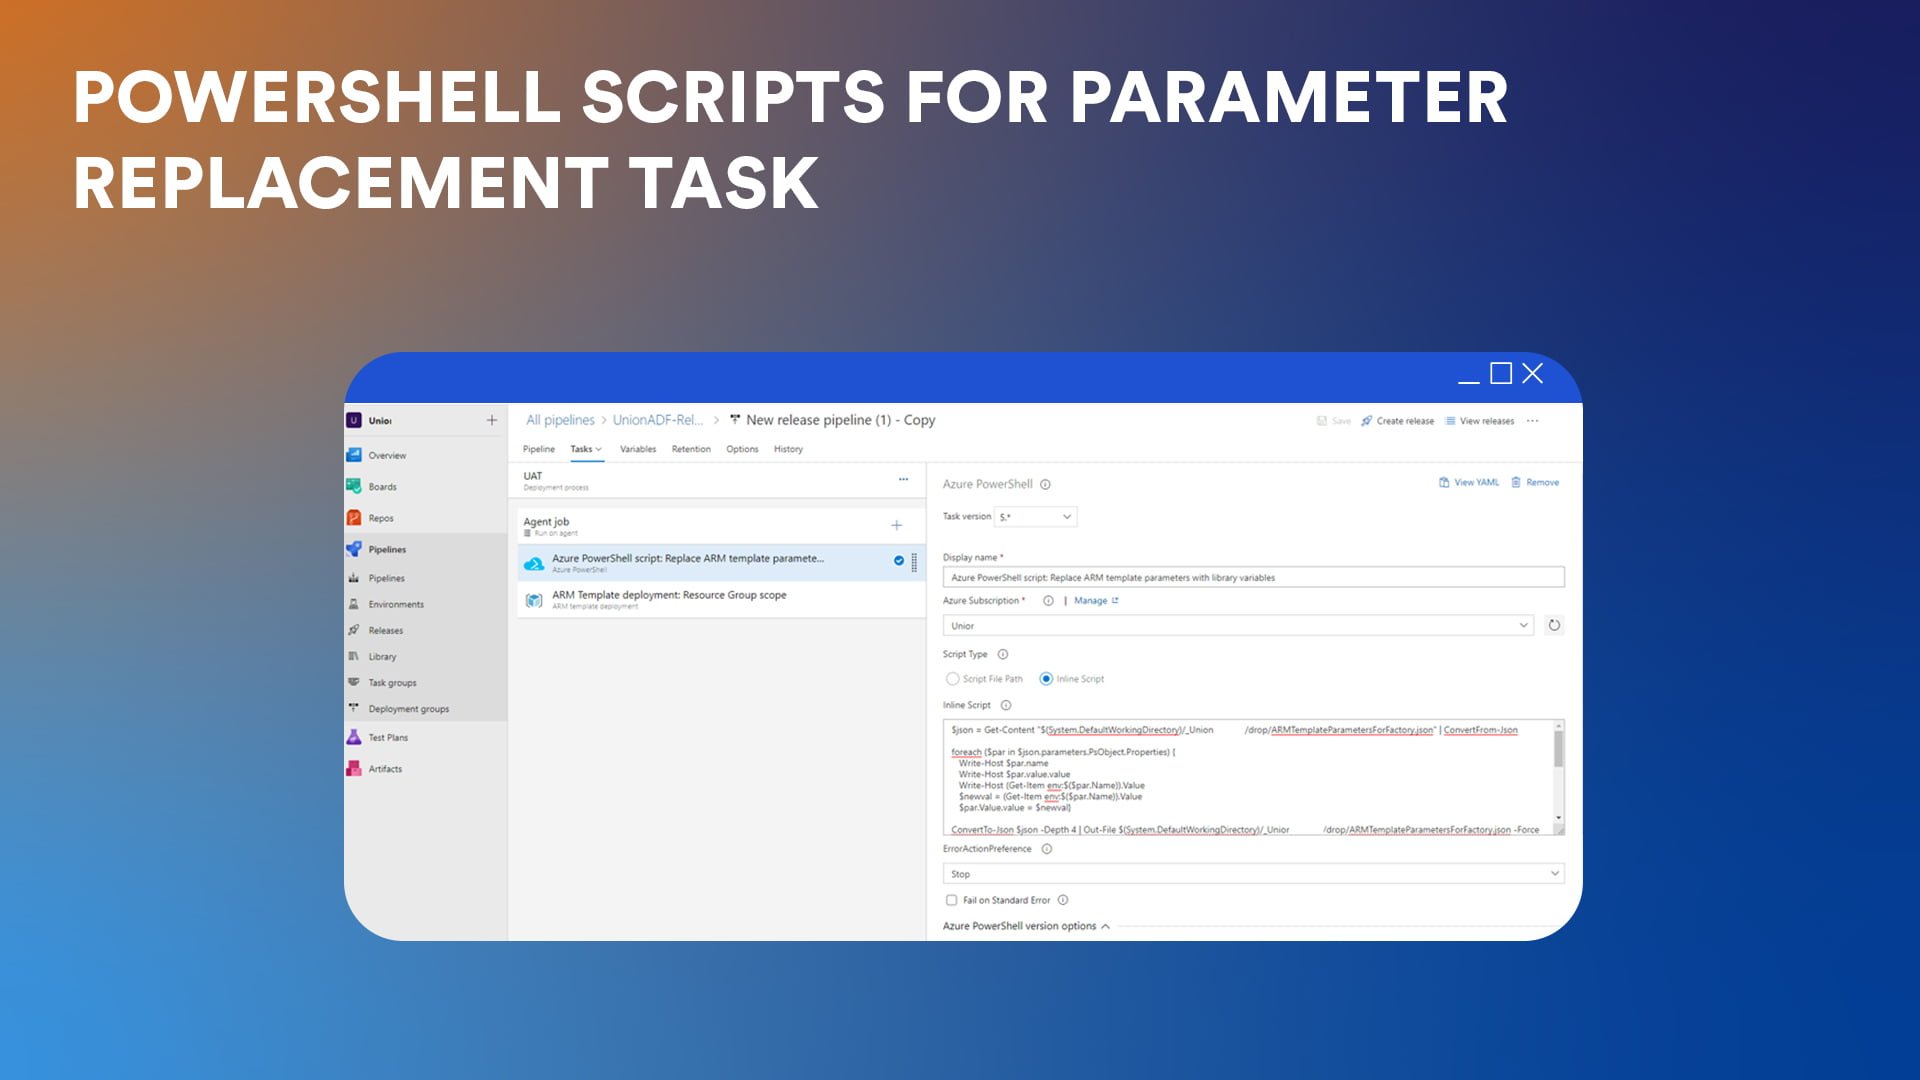
6a. PowerShell scripts for parameter replacement task
To help manage parameters better, Carmen has turned to a PowerShell script. “It iterates through all the parameters in the ARM parameters file and swaps in the variable values we defined for the target environment in Azure DevOps. This avoids having to manually override a growing list of parameters every time a new linked service or resource gets added.”
6b. ARM template deployment task
This is the last step of the release pipeline. Without a PowerShell script, this step would have required manual replacement of ARM template parameters every time there was a new service link or data source.
“Always use deployment mode „Incremental”, because otherwise you can delete other resources contained in the ADF’s Resource Group”, Carmen recommends.

Diana’s Pick: Automated JSON file deployment
The second method of automating ADF deployment takes a more custom approach, utilizing the JSON files from the Azure DevOps Repos collaboration branch instead of ARM templates.
Thanks to Dragan Skrinjar, our DevOps Architect from Serbia, who designed this particular solution, Diana was able to deliver faster changes in ADF. She prefers this approach because “it allows me, first of all, to be selective about deployments. It’s very effective compared to the full option and it’s much more natural and similar to managing the code of other applications”.
Step 1: Set up GIT integration for ADF
See the step one from the previous section.
Step 2: Generate separate JSON files
While ARM templates consolidate all the ADF objects into a single template, you can also manage them as individual JSON files stored in Azure DevOps Repos. In the custom approach, we take advantage of the fact that each object in ADF (datasets, linked services, pipelines, triggers, etc.) is stored as a separate JSON file in the collaboration branch.

Step 3: Configure variables
Similar to ARM template parameters, you can also configure variables inside your JSON files: “You can parameterize any property in the JSON definitions. And it’s much easier to do hotfixes by modifying a single object file.” Diana mentions.
Step 4: Create the build pipeline
Similar to the ARM template method, a build pipeline is created in Azure DevOps to generate the artifacts from the JSON files in the collaboration branch.
Step 5: Parameterization and deployment
The release pipeline for linked services used by Diana involves four steps:
- Replace the key vault name in the JSON file according to the values from variables and the scope of the release (pre-prod, prod).
- Replace the integration runtime name using the same principle.
- Use a PowerShell script to replace the values for linked services, such as connection string names and secret names.
- Perform the actual deployment using the Azure Data Factory Deployment component from the Marketplace.
The Azure Data Factory Deployment handles replacing things like the subscription ID, resource group, and ADF name based on variable values and release scope.

Step 6: Handling triggers
When dealing with triggers, the deployment process becomes more complex. Diana explains, “Deployment with the Marketplace component is more difficult to do because you have to go and manually stop the triggers before deploying to the respective environment, which we didn’t want.”
In order to automate this process, Dragan and Branislav Zuber, DevOps Senior from Serbia saved the day once again and created PowerShell scripts, used to stop the triggers, replace the values from variables, and then restart the triggers when the deployment is made to the respective environment.

Diana and Carmen’s tips
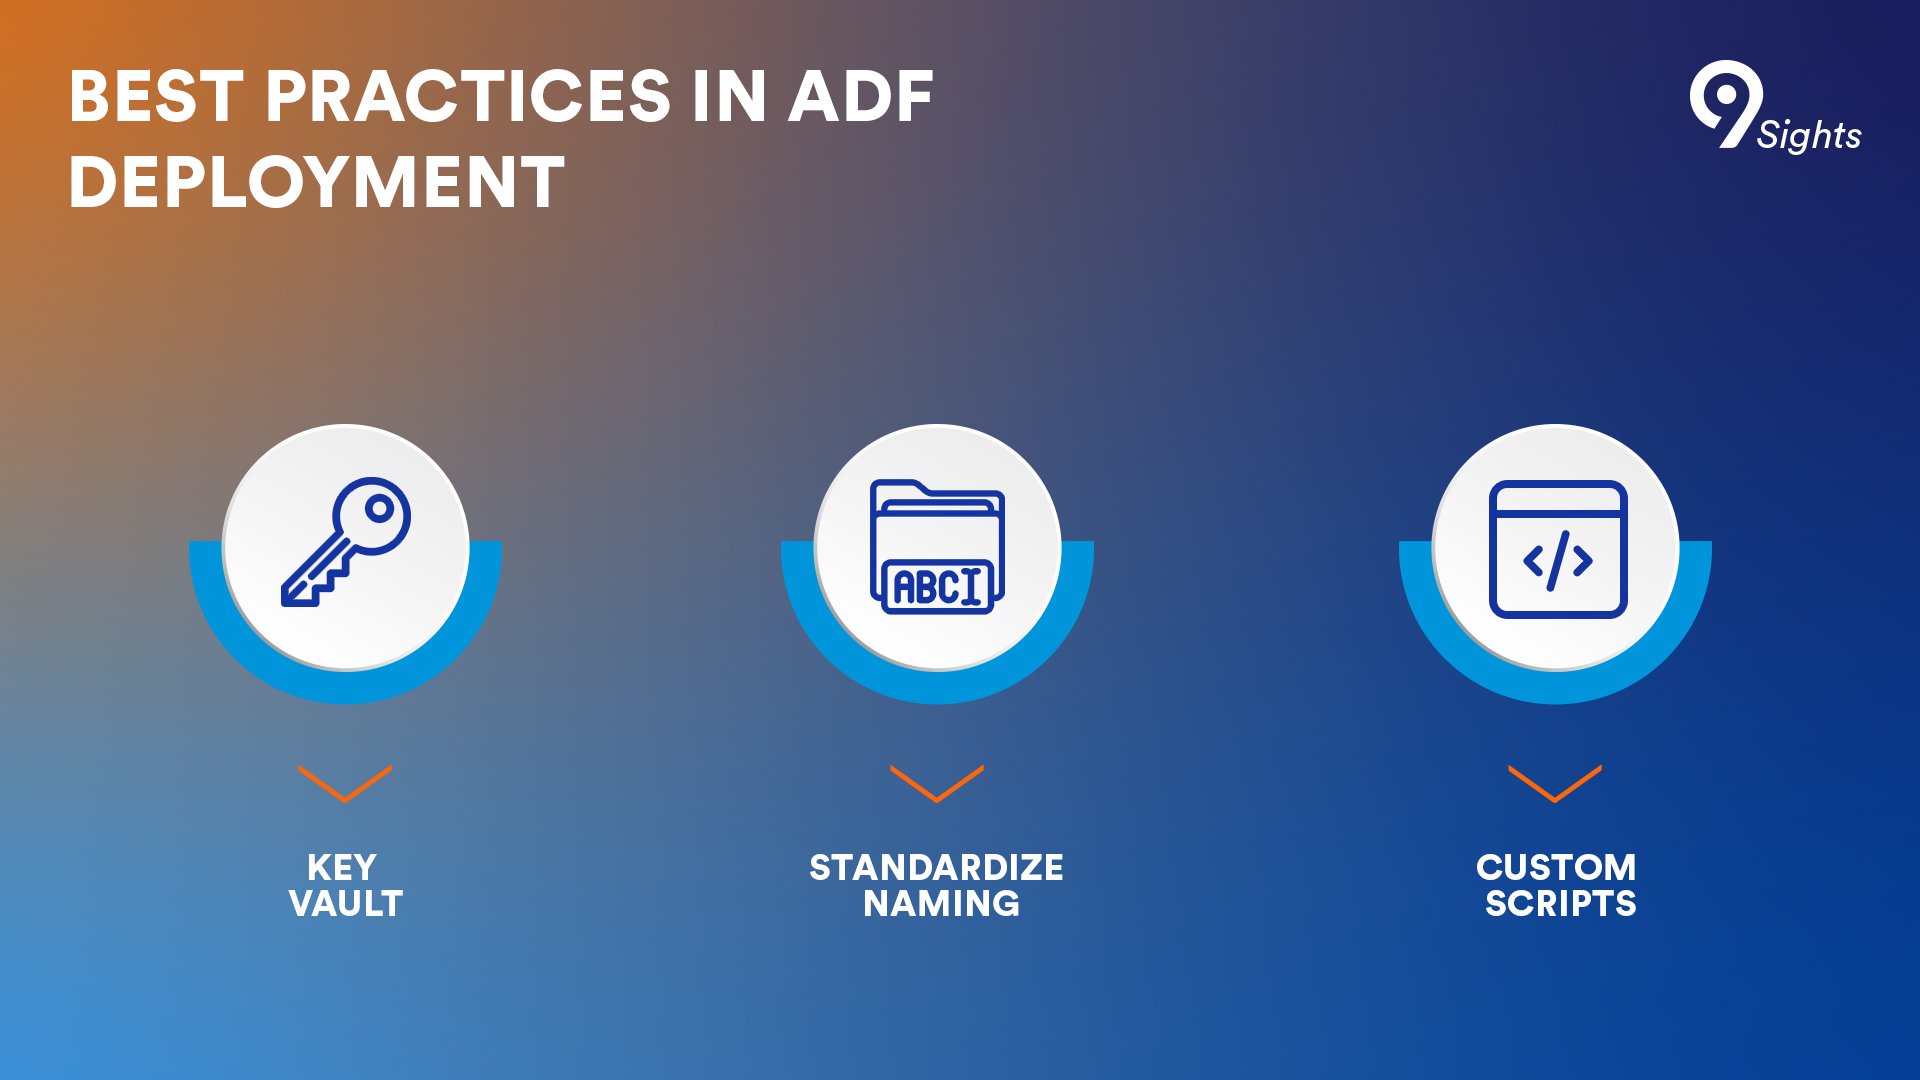
Here are some best practices that apply to both ARM template deployment and custom JSON file deployment of Azure Data Factory:
- Use key vault: Store passwords, access keys, and other secrets in Azure Key Vault instead of directly in pipeline or linked service definitions. Use a separate Key Vault for each environment. Give secrets unique names across environments to avoid extra parameterization work.
- Manage environments separately: Only the development ADF workspace should be linked to source control. For QA, UAT, and production, use the Azure portal User Interface.
- Standardize naming conventions: Use a consistent naming convention for linked services, datasets, pipelines, etc. Makes parameterization much simpler.
- The power of PowerShell: Be it parameter change or trigger management, PowerShell scripts bring a lot of value. If you are not used to writing code in PowerShell, your first try might prove tricky. Both Diana and Carmen advise you to not give up immediately or request assistance from a DevOps specialist. PowerShell is not the only option you can count on. For example, if you are more comfortable with Python, you can use a Python Script task to perform the operations you need.
Which one is the right approach for you?
Both methods for Continuous Integration and Continuous Delivery (CI/CD) use automation to achieve faster delivery, cost saving, efficient testing and reduced human error rates.
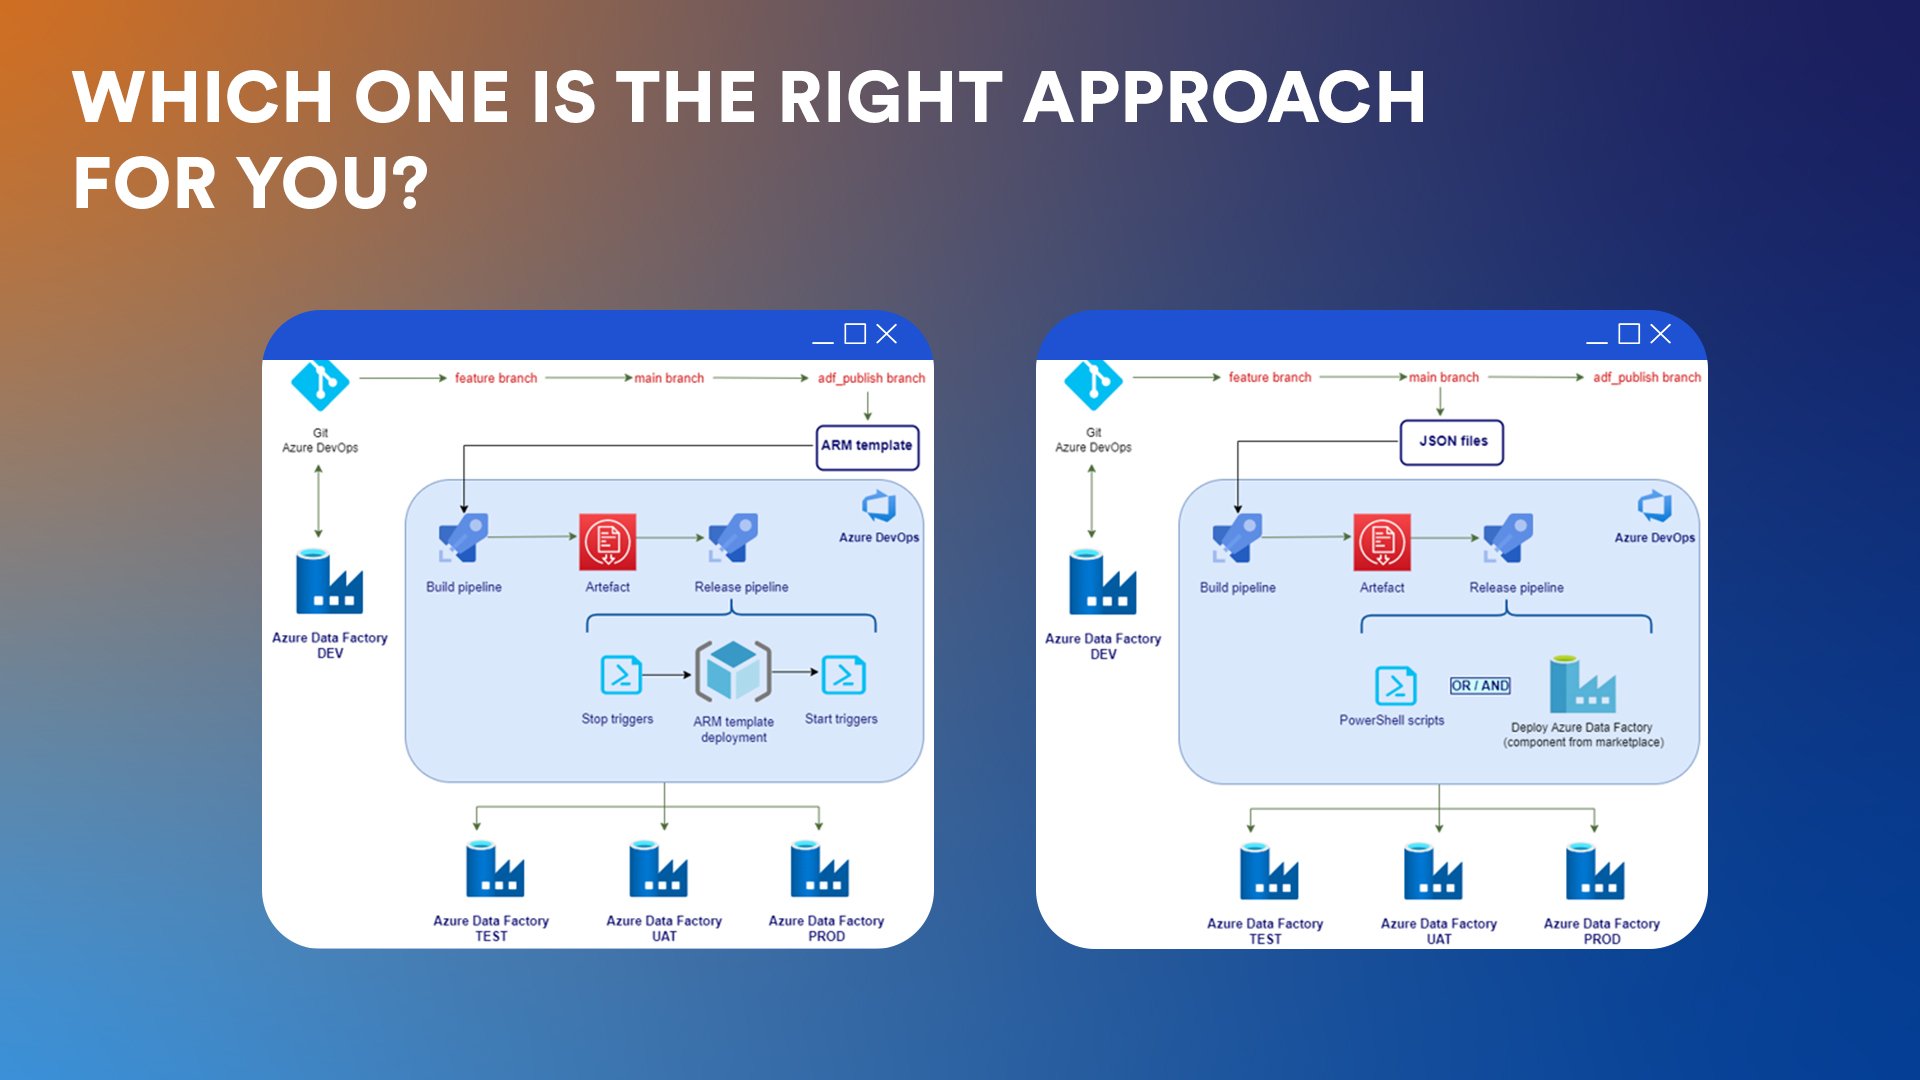
While the ARM template approach follows Microsoft’s official recommendations and provides a more standardized way of deploying ADF pipelines, the custom JSON file method offers more flexibility and control over the deployment process.
The first method generates a single JSON file that includes all the objects and their dependencies, making it easier to manage the entire solution as a whole. On the other hand, the JSON files deployment method allows for selective deployment of individual objects and is more natural and similar to managing the code of other applications. However, this approach requires more custom scripting and may be more complex to set up initially.
Depending on how much control you want over the deployment, as well as the specific requirements of the project and the client, you might prefer one over the other. Both approaches have proven to be effective in automating ADF deployment and streamlining the development lifecycle.


