Open banking is a financial revolution at our fingertips. For customers, it gives them unprecedented freedom and ownership of their bank information. At a macro level, it allows for a standardized interface between various banks and fintech providers. For us, developers, it’s a playground for innovation.
Before diving into this quite technical guide for accessing bank data via an API provider, you might want to read our previous article on the history of Open Banking and some use cases.
What follows is a step-by-step guide on how to access bank information using an API. You might want to use your own account, or you might need to do this for testing or development purposes. This demo uses my own bank account. Feel free to use yours when you follow the instructions.
Accessing information about somebody’s account and transactions is more complicated than simply calling an API. Even though banks do have APIs, banking data is strictly regulated, so third parties that wish to call the API directly need to be registered and certified with a national authority. Registering with the bank’s API and buying a certificate costs around 1000 euros every two years. It might not be worth it if you just want to experiment and play around to see what’s possible. However, there are some limited options available.
Here are the options I considered:
- Tink is a robust open banking platform, but it did not offer access to Romanian banks, which was needed for the purpose of this demo;
- Smart Fintech is a Romanian third-party bank data integrator, but the free trial covered only the Payments solution and not the Accounts information solution I was interested in;
- Nordigen is a company from Latvia that has a generous free tier and offers access to all relevant information about the account via an API.
For the purpose of this demonstration, I will use Nordigen.
Step 1: Get access token from Nordigen
Create an account with Nordigen, which is free to use for limited purposes. Find the API documentation at this link to be able to follow along with the demonstration.
Get your user account secret keys and import them into Postman service collections. See a guide here. You can use the secret keys to generate a token, as demonstrated below.
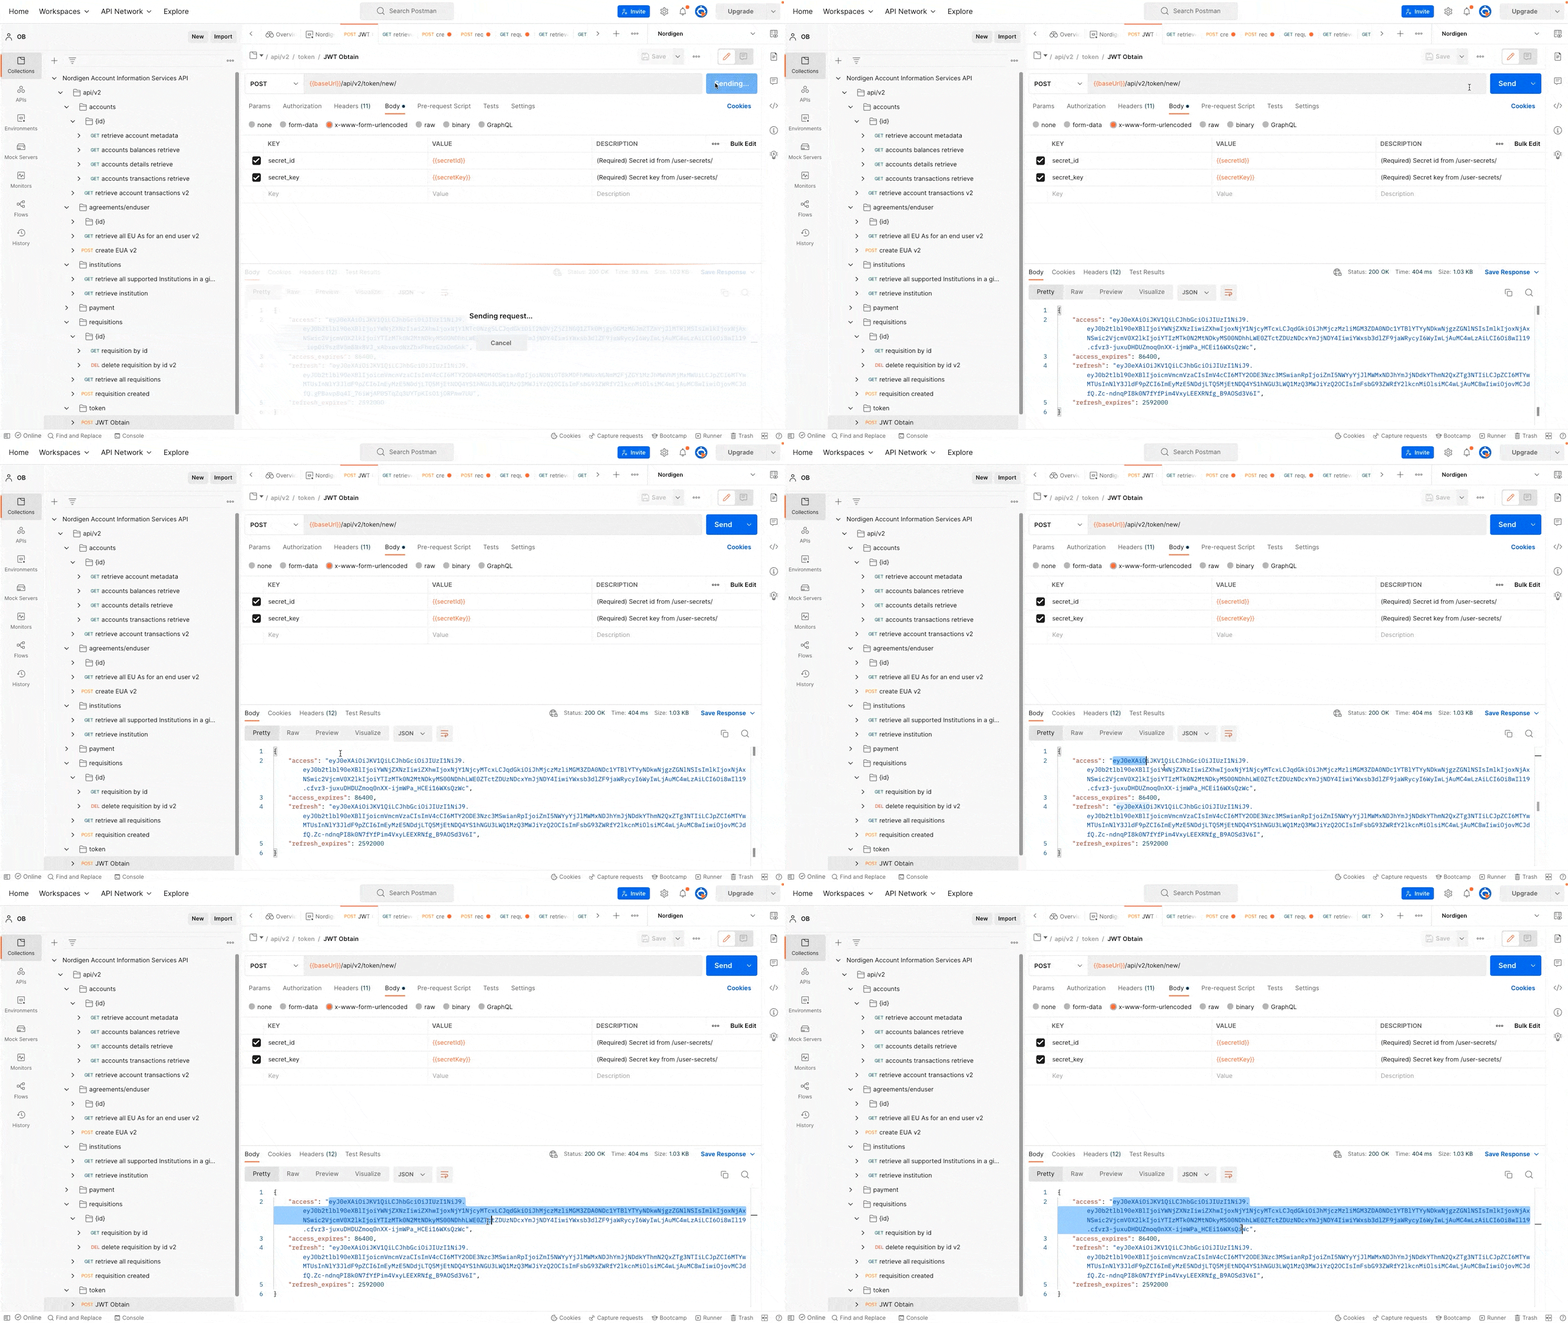
Copy the access token from the API response and add it to the environment variables.
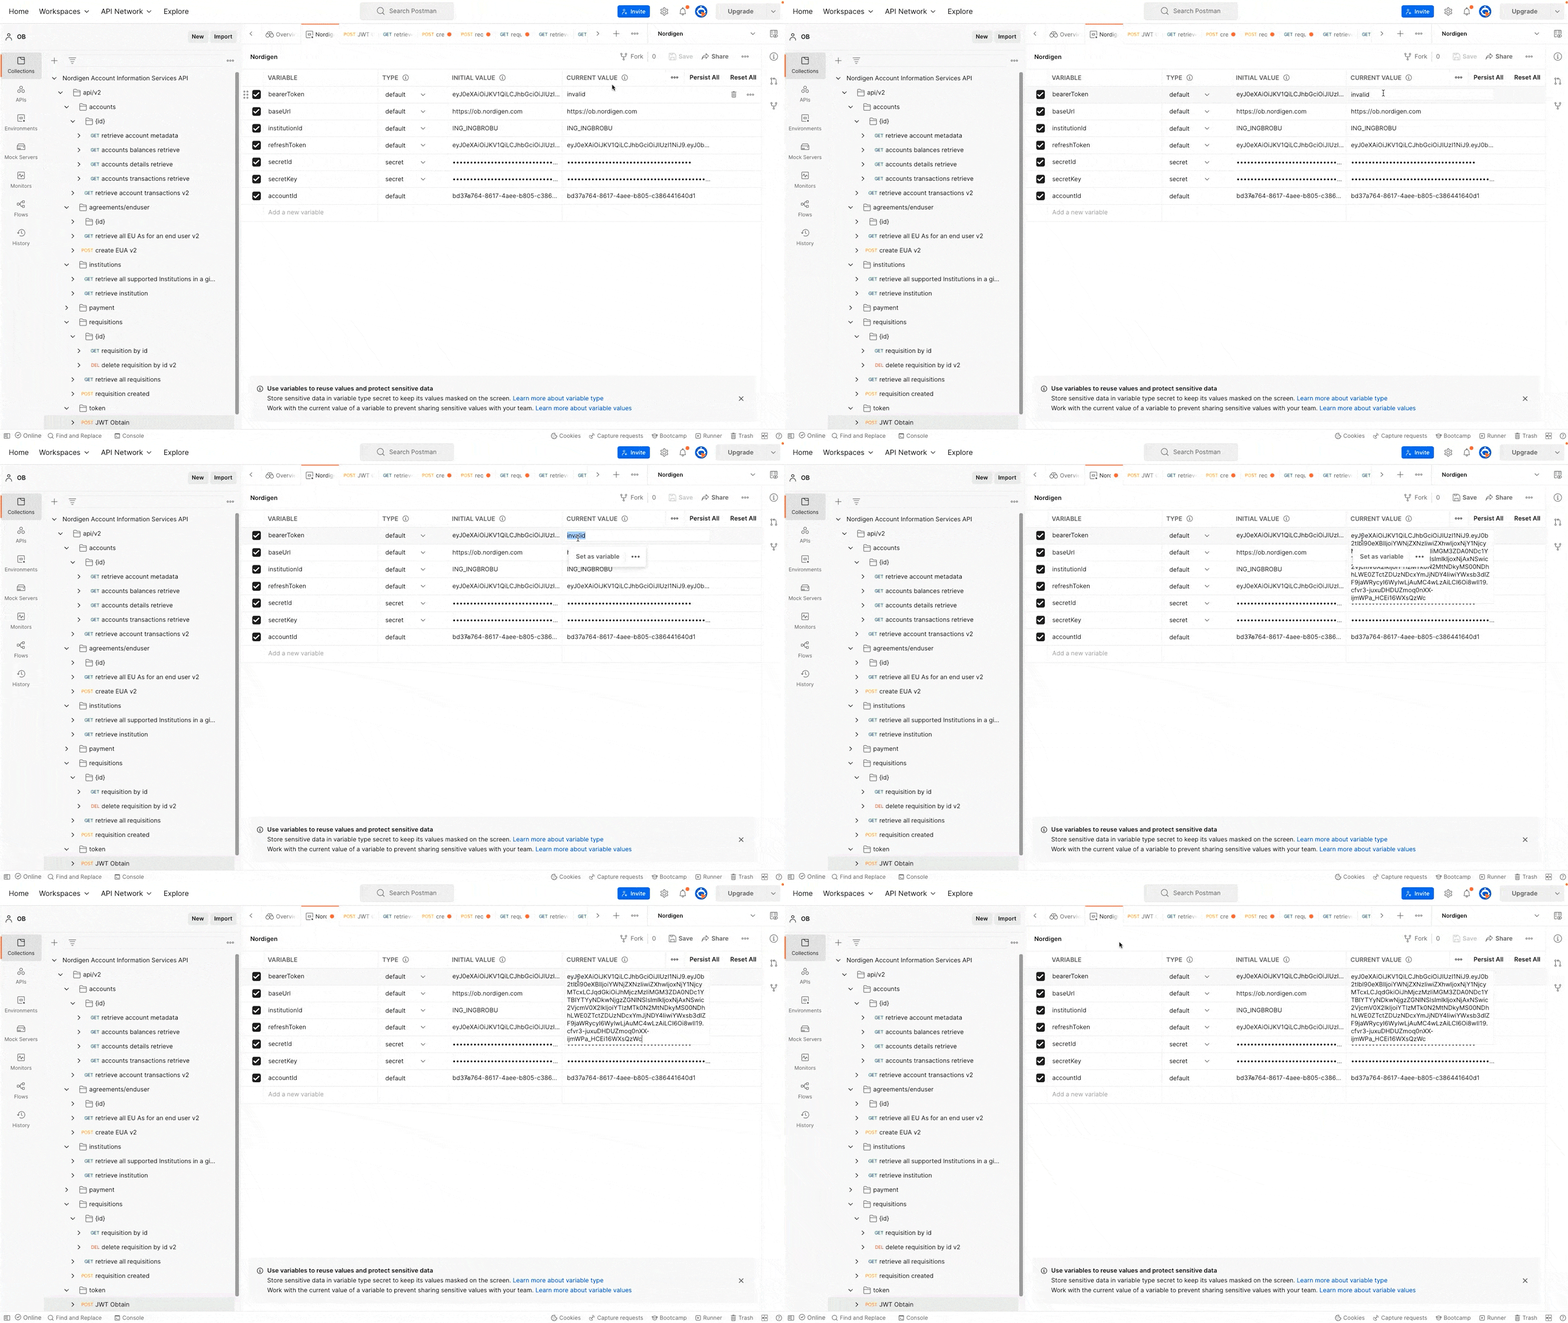
The access token is good for a few hours and can be renewed if necessary. With the access token, you can then use the other endpoints from Nordigen to access your bank information, allowing you to make full use of the API.
Step 2: Get a list of banks in your country
Before you can access banking data, you have to call an API endpoint, which gives you a list of banks in that country, and you need to choose which bank you want to access.
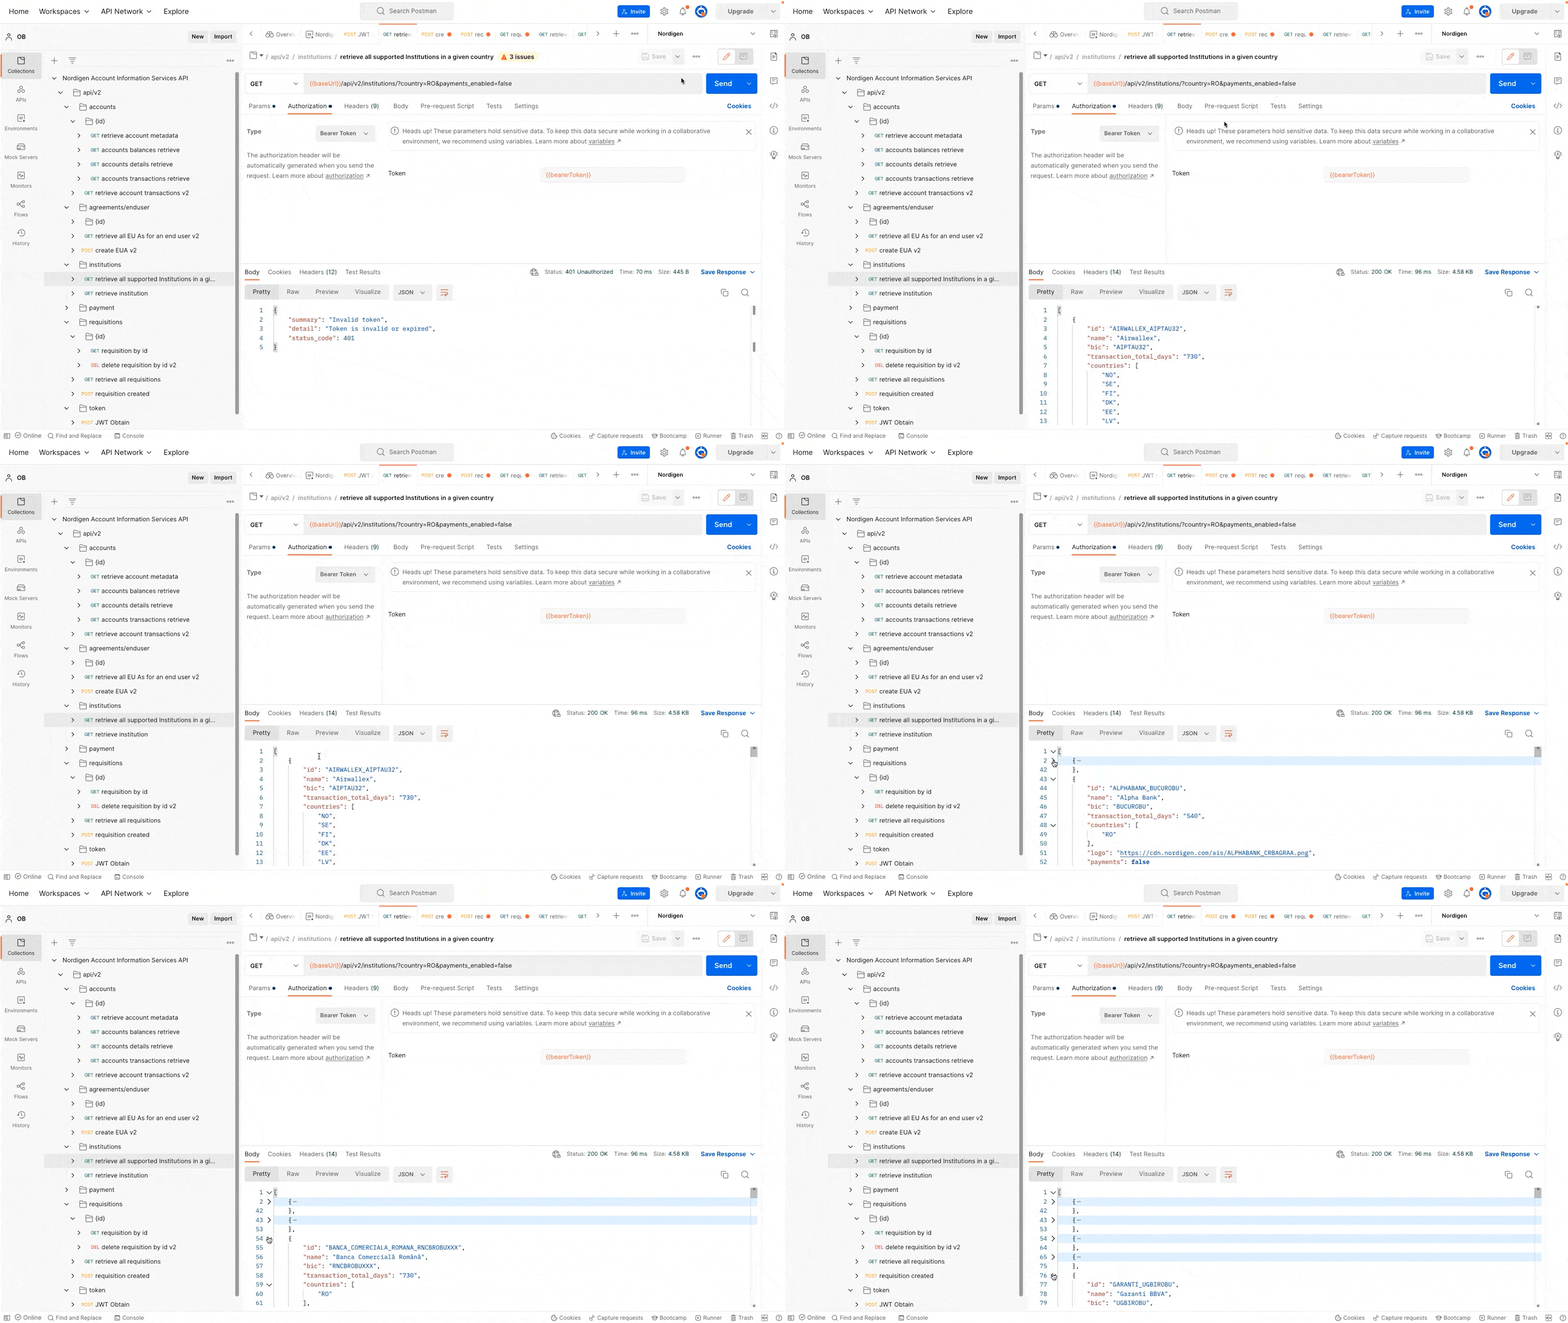
Aside from a list of bank entities, the API response includes information on how many days back you can access transaction records. For example, ING, which I will continue to use in this guide, offers transactions for two years. Some banks might decide to offer less historical data. You’ll also see a logo for the bank, so you can easily identify it.
Step 3: Create an end-user agreement
Using the bank ID from the previous response, you can choose to create an end-user agreement if desired. In Postman, make sure to list the scopes for which you want to get permission. In this example, account balance access, account details, and transactions are all used.
This will allow Nordigen (or any other third party you use) to access your banking information for the next three months. By default, access is granted for three months and includes historical data. You will see this agreement both at the bank site and within your implementation. If you wish to grant access for longer than three months, you must explicitly change the values.
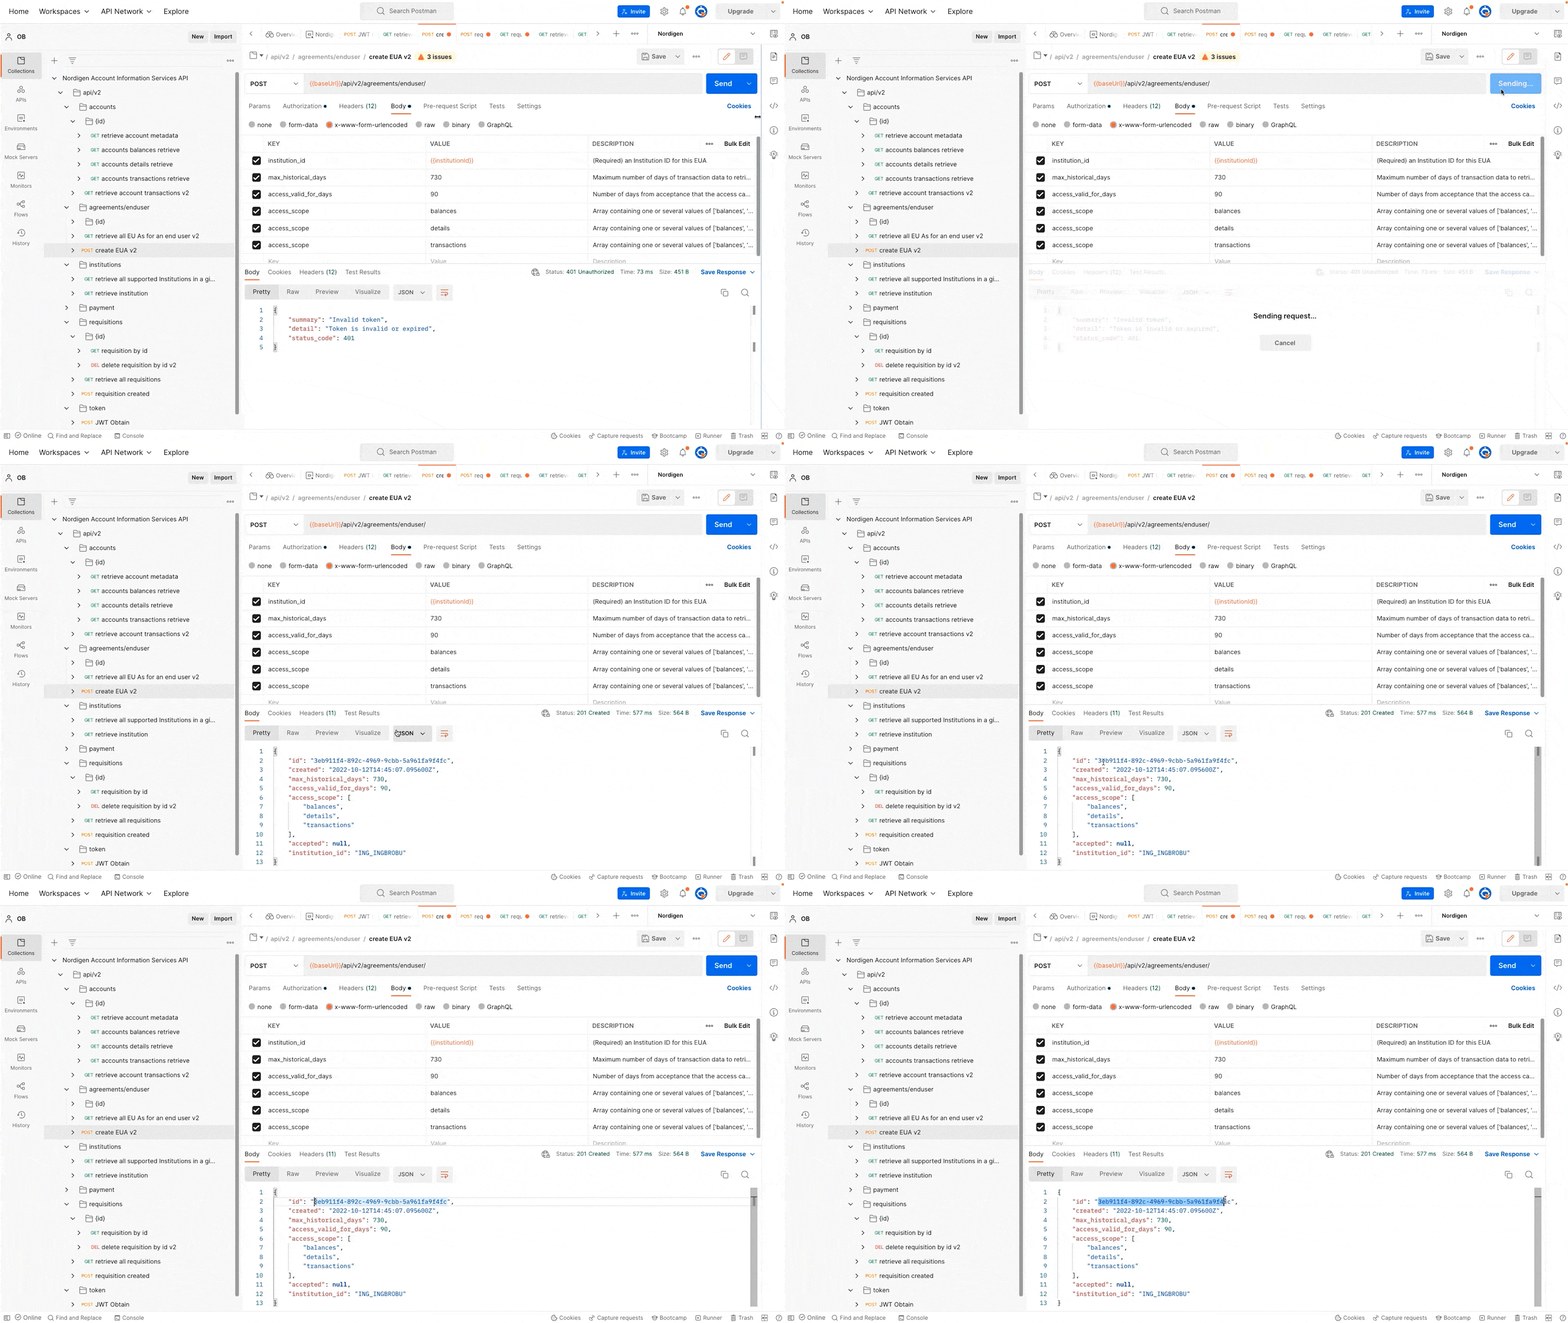
You will need the generated ID value for the next request.
Step 4: Build a redirect link
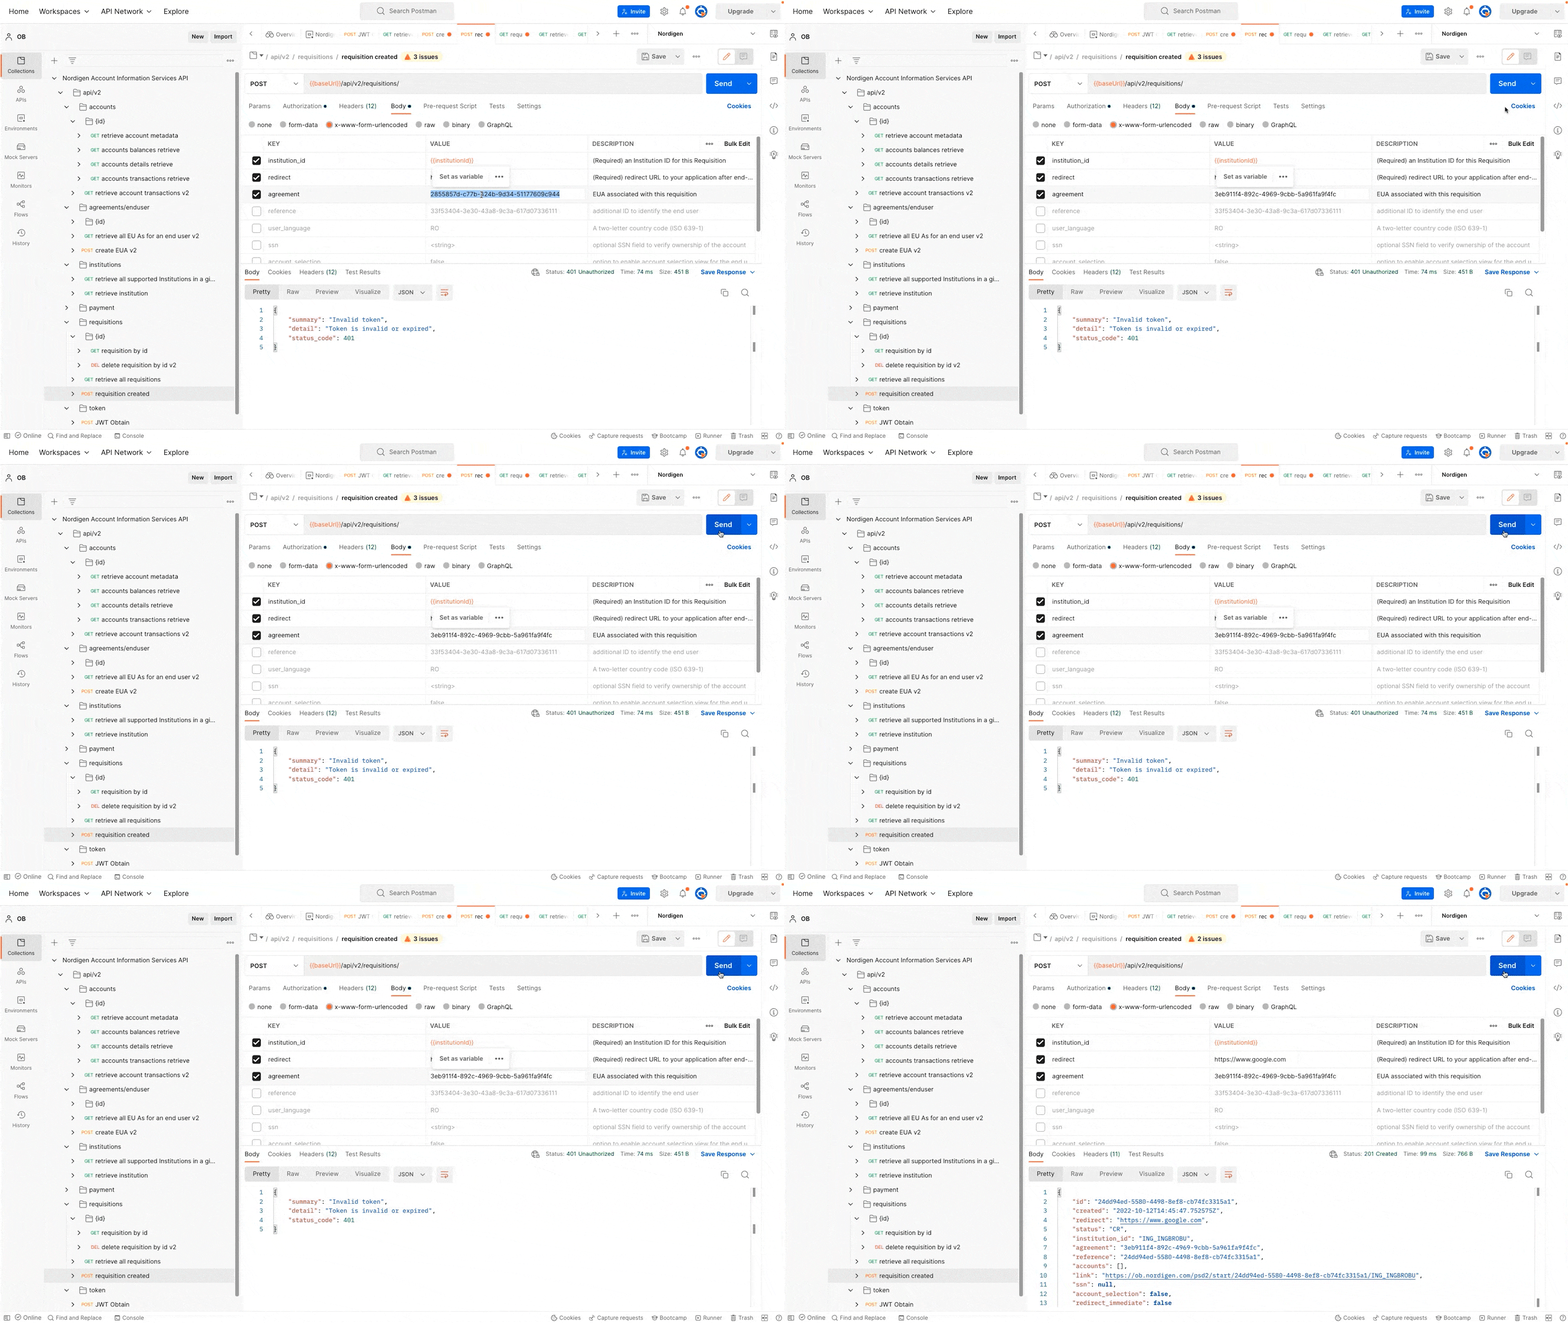
The next step is to build a redirect link. Normally, this link should contain unique identifiers such as the chosen bank and a way to identify the client ID. When the authentication process is done, the person is sent to the link you put in the redirect field. If this were an app and not just you experimenting in Postman, this would work like your “landing screen.” And once the customer has returned to your app, the app would have access to the customer’s accounts.
For the purpose of the guide, go ahead and just type google.com.
Step 5: Sign the agreement
The API response from the previous call will contain a link. When you click it, it will take you to an agreement page. You will be asked whether you agree to share the various types of bank data information you mentioned in the Postman scope variables, and you will clearly see how far back in time the API can grab information.
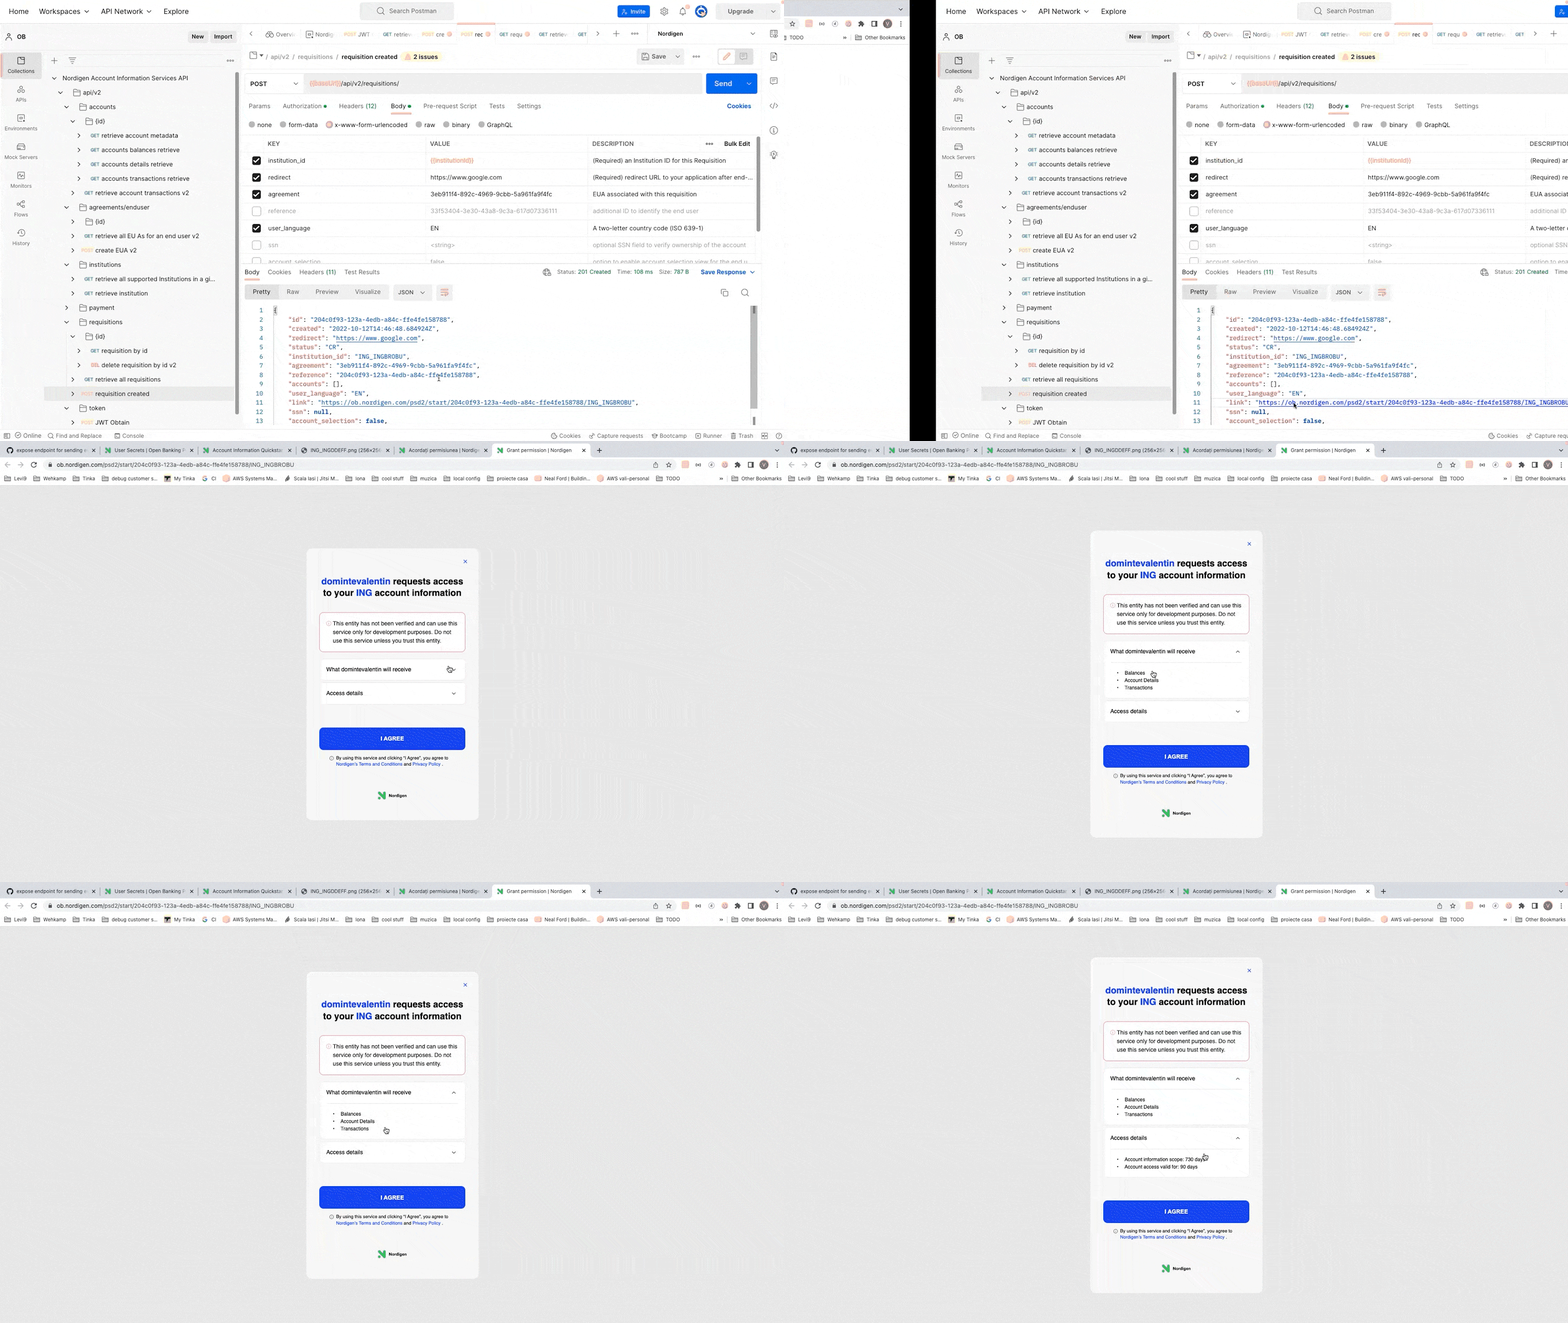
If you use your own account while following this demo, you will be taken through your usual bank authentication process. If you have multiple accounts, you can allow access to all, one, or several of them.
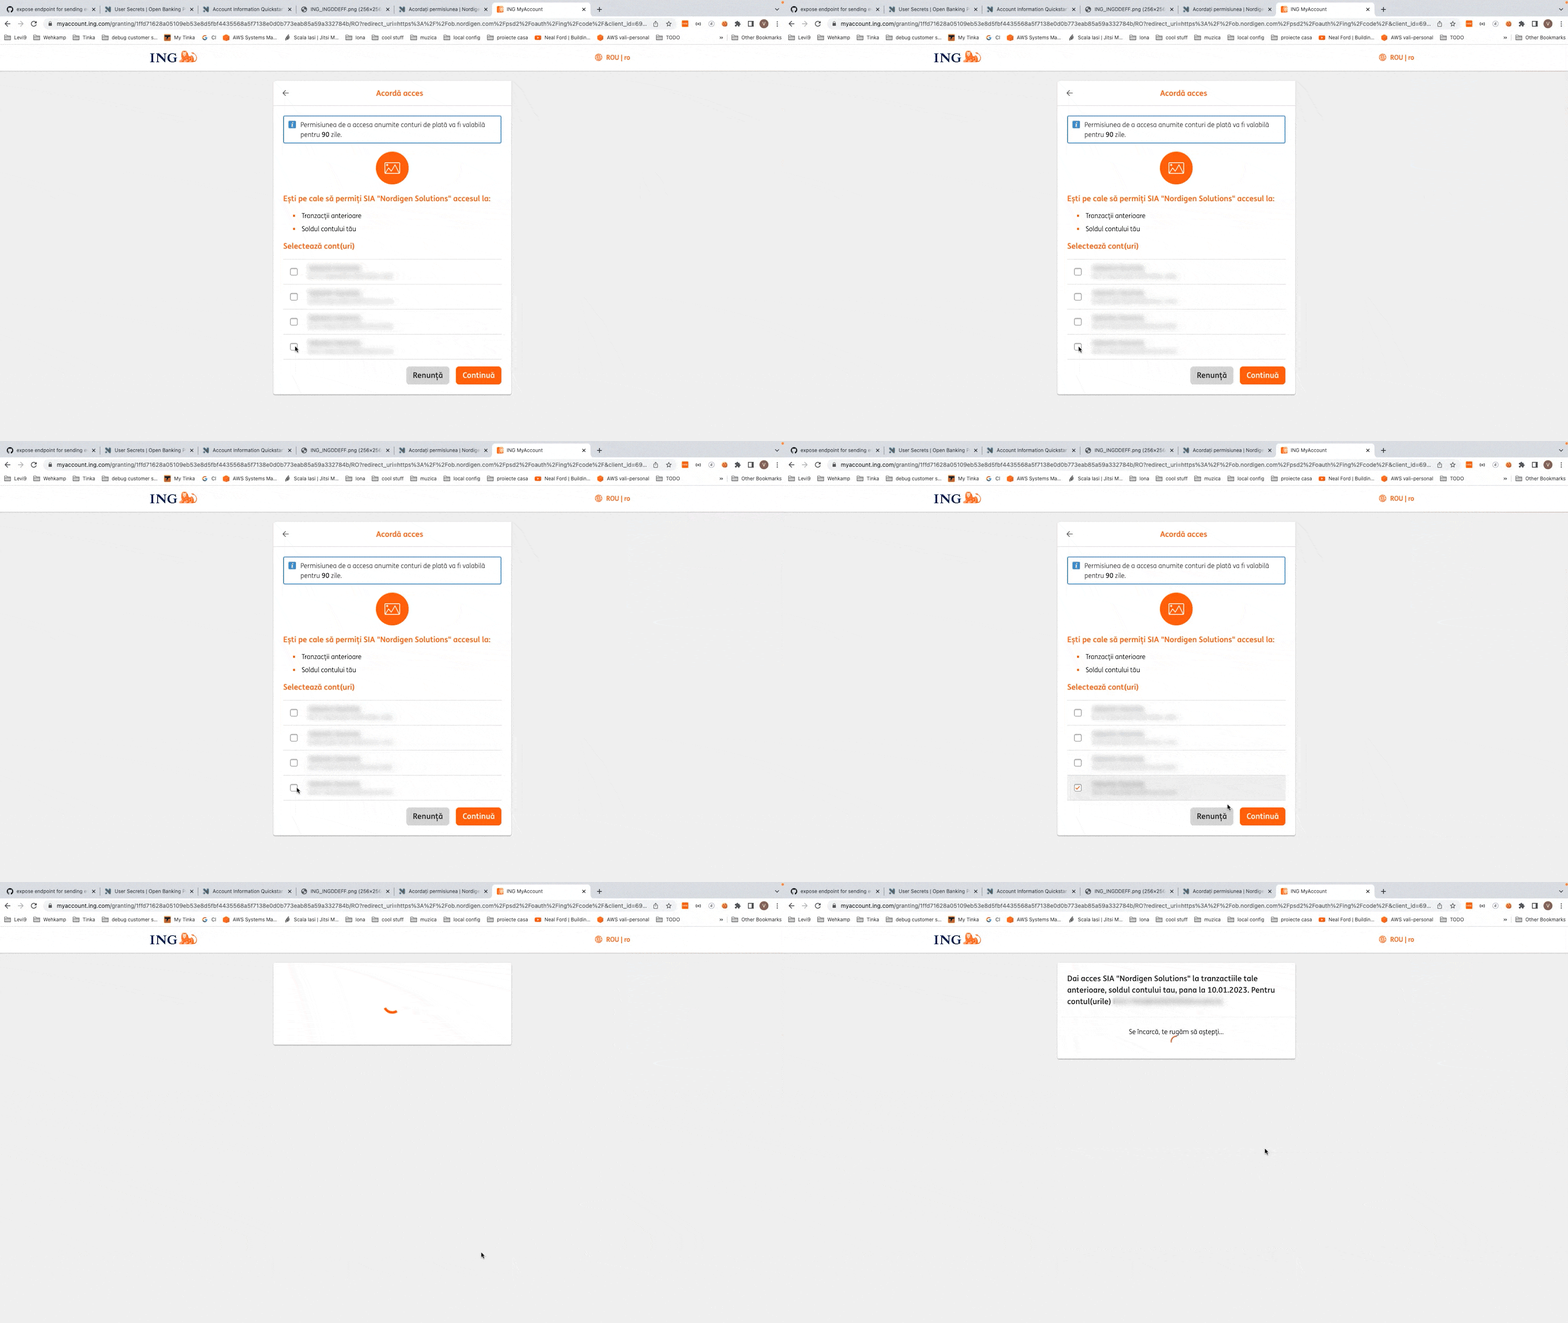
Following the agreement, you’ll be taken back to the redirect link you defined in Step 4, which in the case of this demo is simply Google. In a real-life scenario, a customer would normally be taken to the landing page of the app.
Step 6: Check whether the account was linked successfully
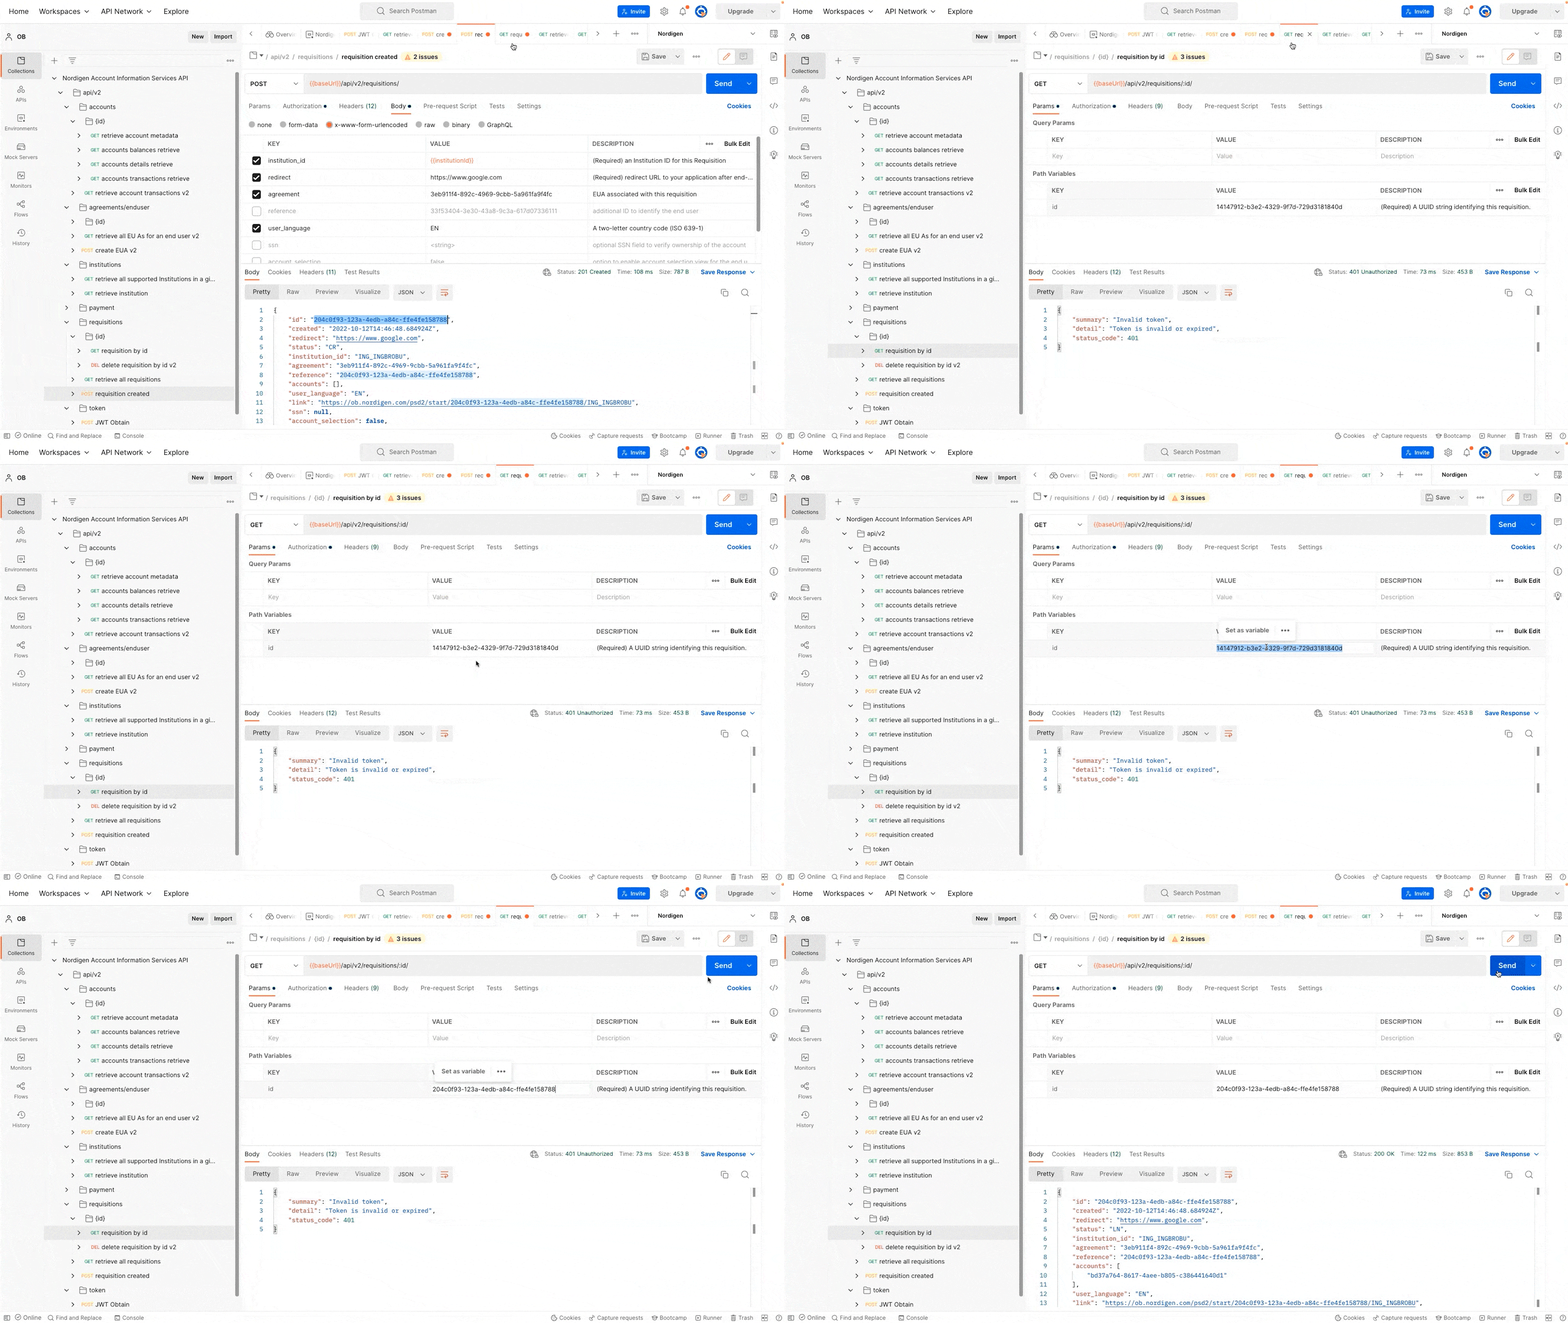
Just in case something went wrong in the previous step, you can check whether the service was successfully linked to the account through the Nordigen API. Go back to Postman and copy the requisition ID from the previous call. You can use it to call the requisition endpoint and check the status.

If the operation is successful, the status will display LN, which stands for “linked.”
Step 7: Get information about the accounts
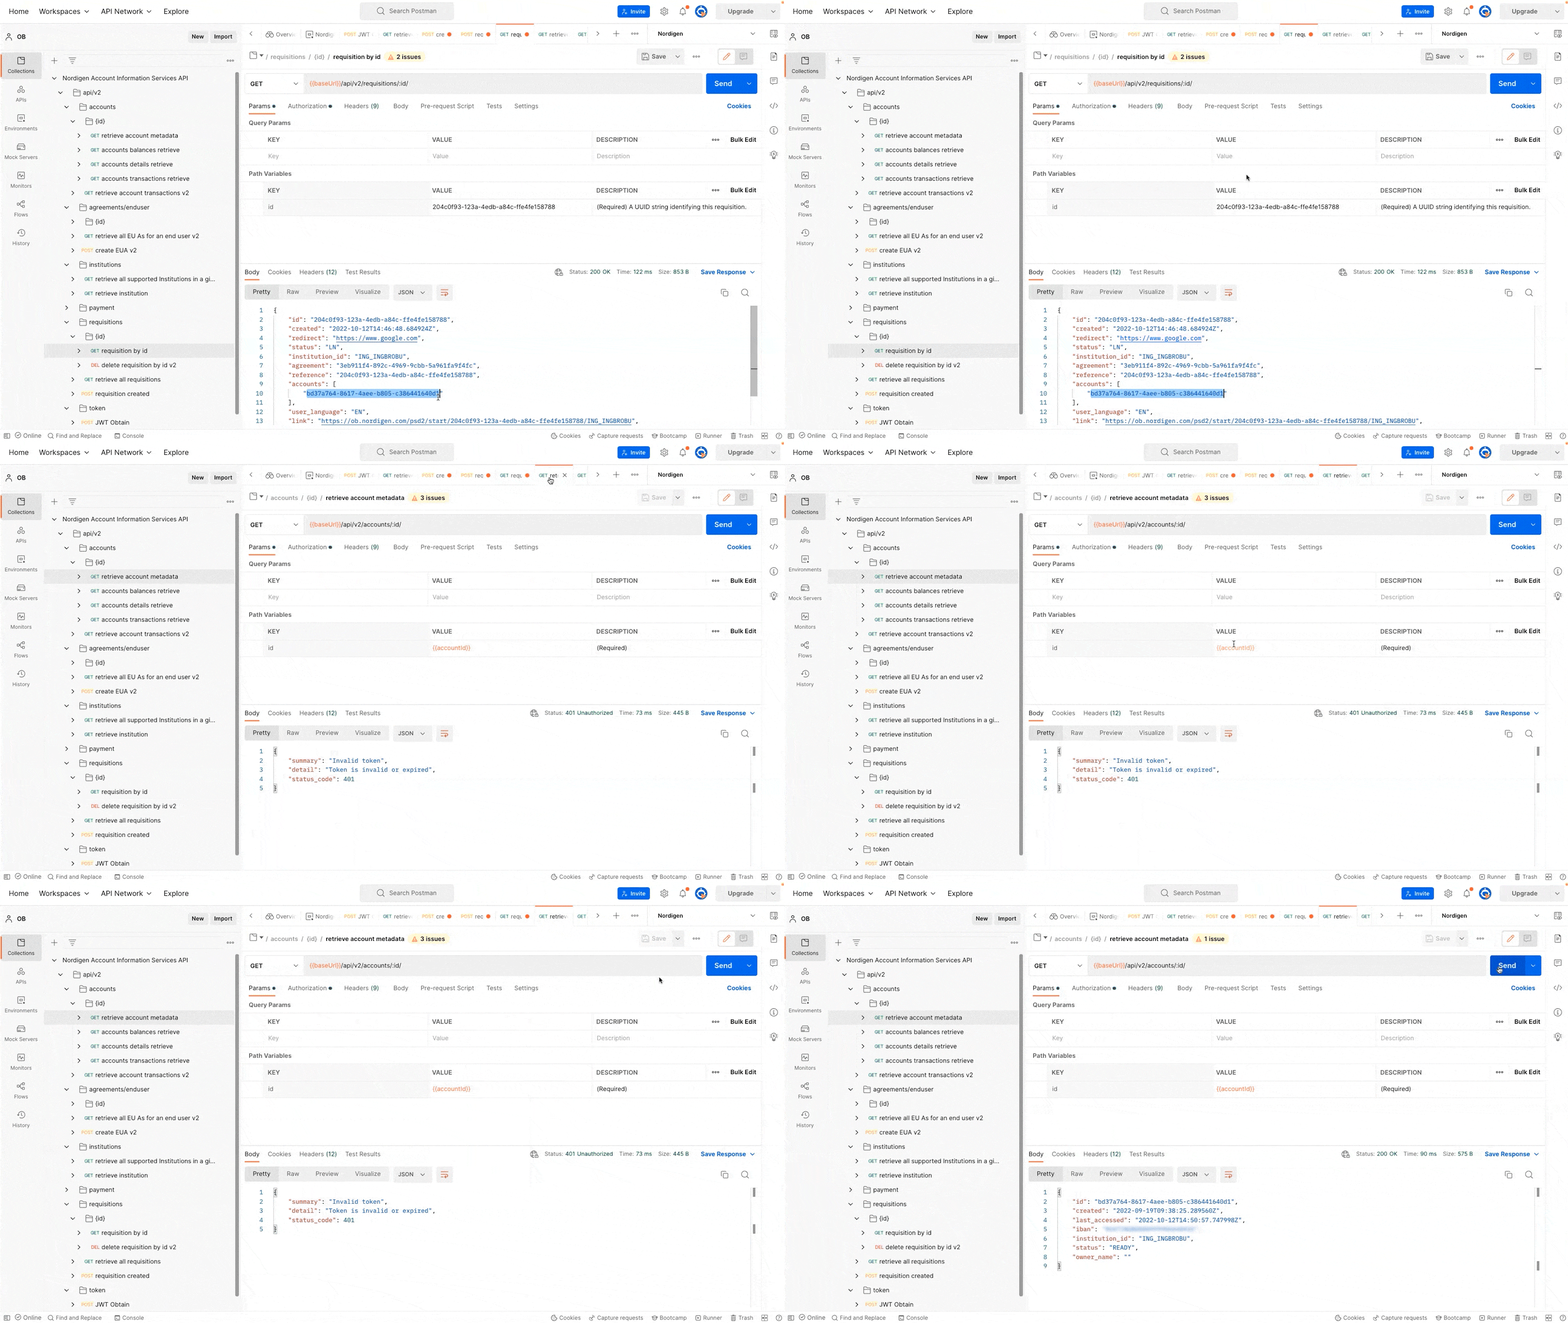
The requisition response from Step 5 will also contain the account ID to which the API was granted access. Using it, you can get more details about the account using the endpoint that exposes the details of that particular account.
As a response to this call, you will receive more information about the account, such as the IBAN number, when it was first created, and when it was last accessed.
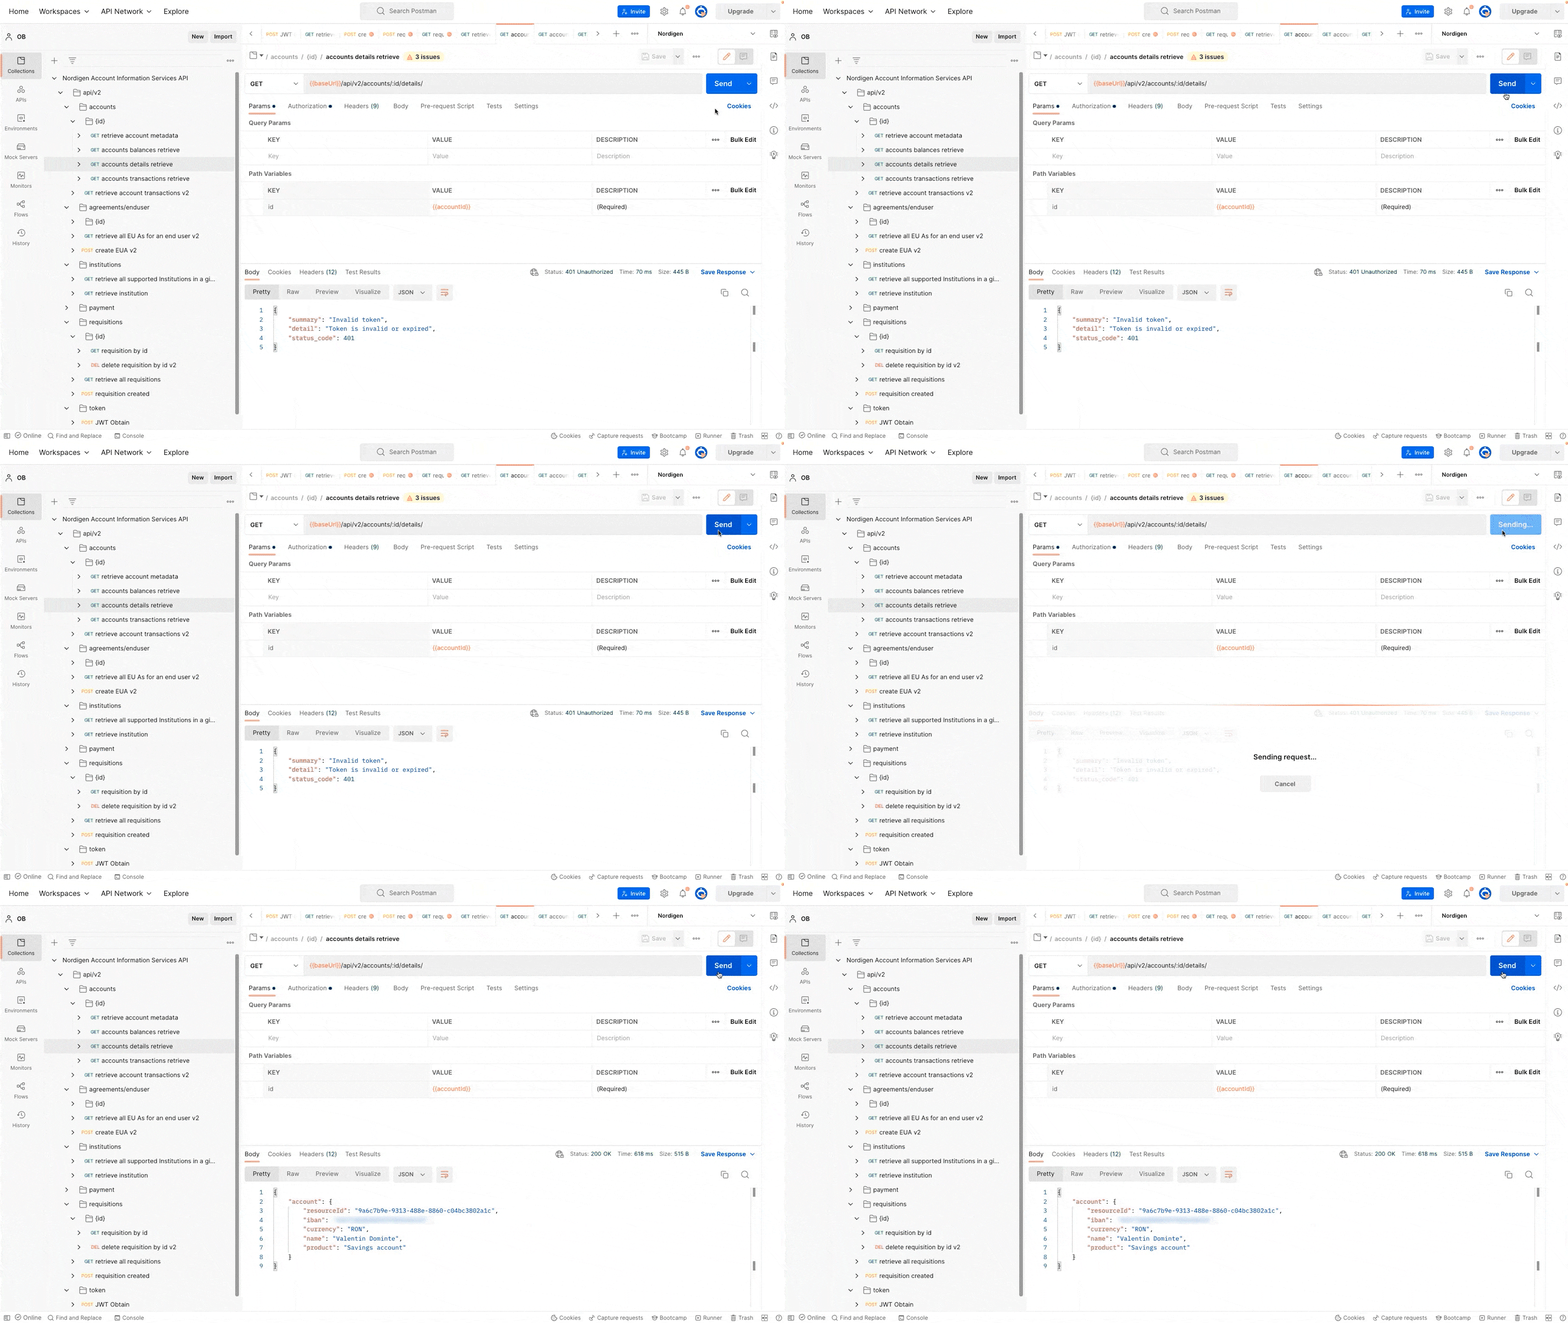
Nordigen also has an endpoint for account details. This endpoint gives access to information about the account’s currency, the owner’s name, and the type of account.
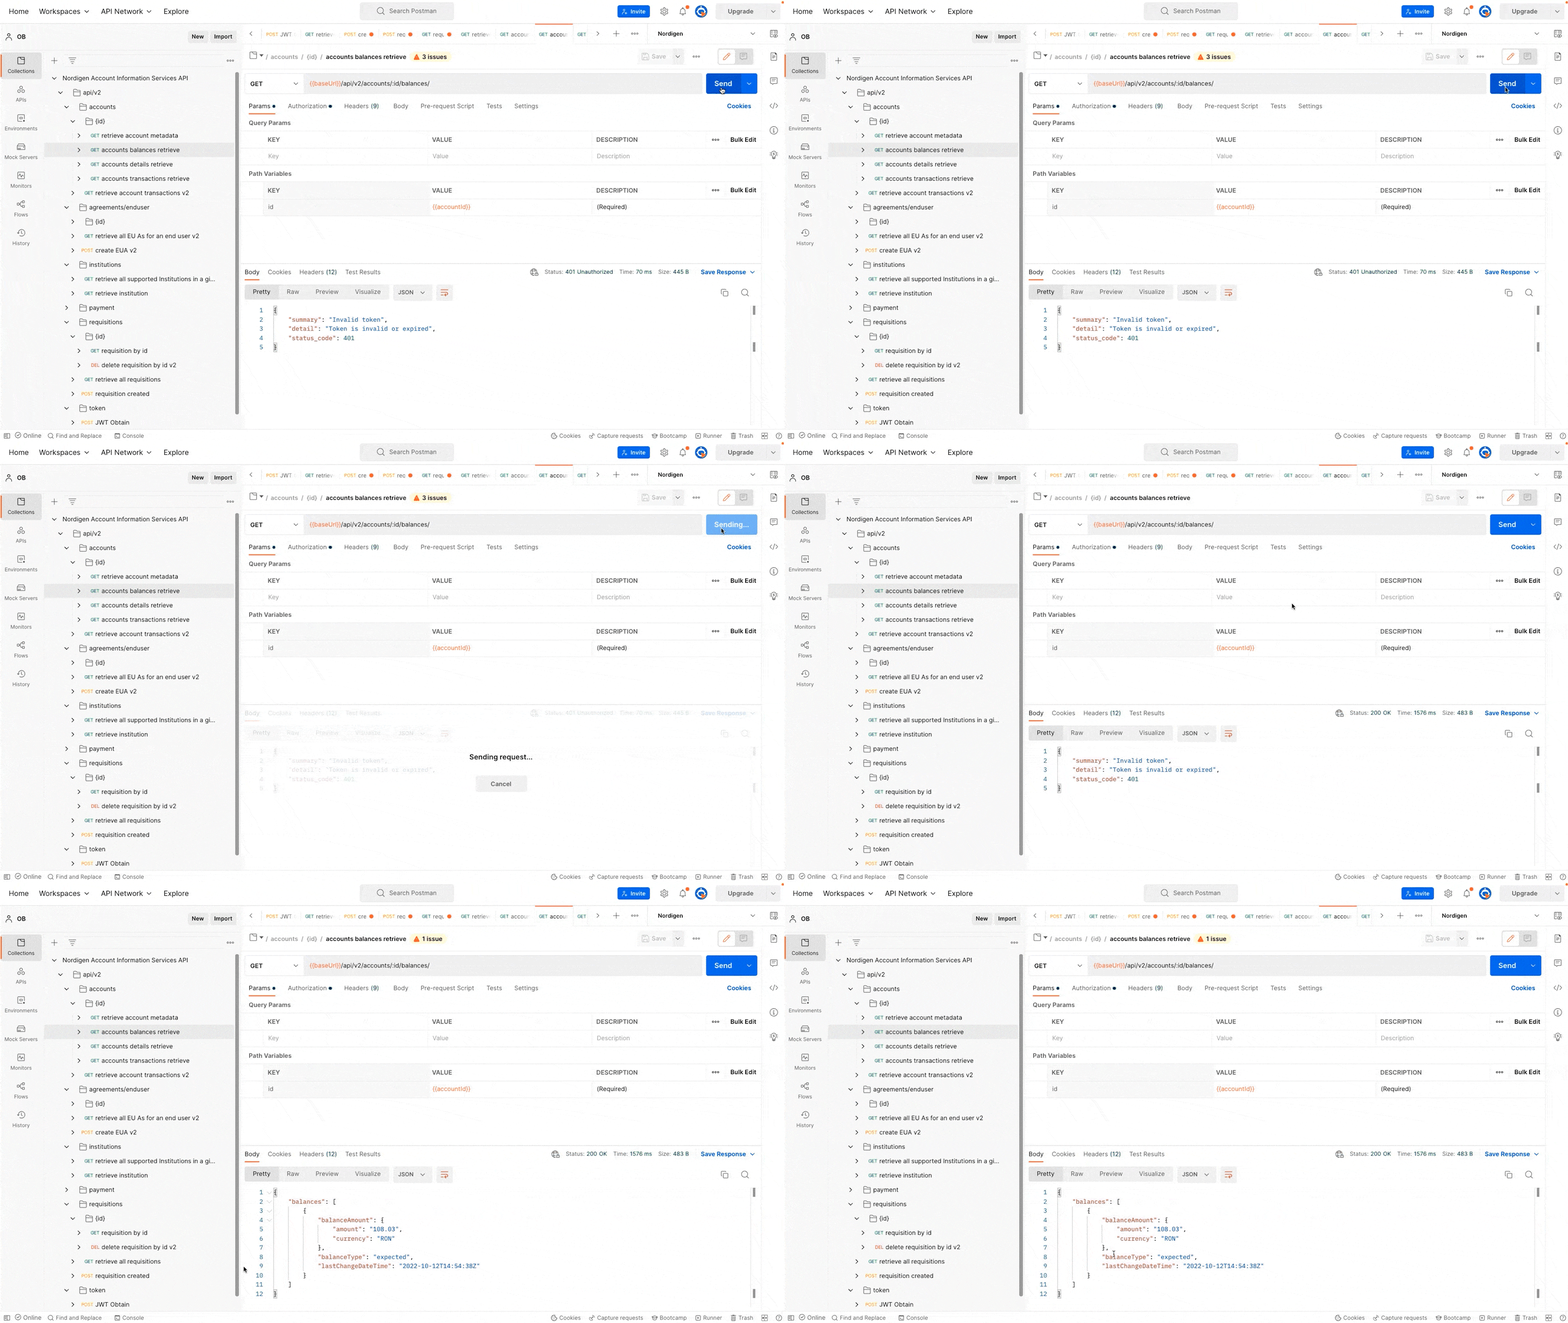
You can also see the balance of the account using a dedicated endpoint.
Finally, you can use the Nordigen API to access the transaction history for that particular account. You can set the date parameters so that the response only shows transactions that happened within a certain time frame.
(Optional) Step 8: Rescind agreement
End users have control over their bank data, which means they can change their minds at any time. This is why Nordigen also provides a way to remove access to the accounts. To do this, you have an API endpoint that exposes all requisitions. By calling it, you can find the ID of the requisition you want to be deleted and then use a dedicated endpoint to delete the requisition using that ID.

After you cancel the agreement, the API won’t be able to access your bank information anymore.
If you are curious about which banks offer open access, you can use this tracker. You’ll be able to see whether the bank has set up a developer portal and what authority you need to register with to have access to that portal as a developer. As an alternative, you can use the solution from this demo and choose an API aggregator instead. You’ll be able to see a list of integrations for each bank, so you can easily choose a service that works with the ones you are interested in.

